
Published: 26 May 2026
Reading Time: 15 minutes
Reviewer: Simon Scrapes, Founder
You know that moment when your PCB assembly line just clicks into place, and everything really works? That’s where the magic happens in electronics manufacturing. But getting there isn’t luck. Reflow ovens keep the whole show running smoothly—and trust me, you notice when something’s even a few degrees off. Precision soldering and less human error? Sign me up! In 2026, as components get tinier and boards more packed, automated reflow ovens have become the quiet workhorse in every serious SMT line.
Plus, let’s be honest. Nobody misses the headache of hand soldering hundreds of parts, hoping every joint is just right. Automated reflow means better quality, quicker runs, and a lot less fire drill on the plant floor. The real value? Uniform airflow, carefully tuned heat, and the kind of repeatability only cool machines can pull off. That’s how you scale from 100 boards to 10,000, all top quality. And when you’re dealing with that level of throughput, every second and every degree counts (SMT reflow oven basics).
Simon Scrapes is an industry expert in SMT equipment manufacturing with over 10 years of experience. With a deep understanding of reflow oven operations and calibration, Simon has collaborated with leading OEMs and EMS companies to optimize electronic assembly processes.
Why Reflow Ovens Matter in SMT
Let’s break it down. A reflow oven is basically the heartbeat of any SMT (Surface Mount Technology) line. Without it, you can’t go from loose parts to sturdy, working PCBs. Here’s why these machines matter in 2026:
- Precision heat, every run: Modern reflow ovens use zones with carefully staged airflow and heating. That means the solder paste melts perfectly, forming reliable joints for those tricky, high-density boards.
- Less human error: When you’re running hundreds or thousands of boards a day, automation isn’t a luxury; it’s how you keep mistakes and scrap to a minimum.
- Speed and scale: Instead of hand-moving boards between stages, everything flows automatically. Production lines go faster, and teams can focus on tuning processes instead of firefighting problems.
- Adapts to new tech: With everything getting smaller each year (hello, sub-01005 chips), today’s ovens have the controls and recipes to handle whatever next-gen components throw at them (why ovens are key for SMT).
In my work with EMS and OEM partners, the difference before and after upgrading reflow ovens is night and day. Lines that used to struggle with weak joints or failed tests are now turning out reliable boards at a steady clip.
Let’s get this journey started—there’s a lot more to reflow than just “heat it up and go.” Next, we’ll dig into how to set up your reflow oven for clean, consistent results.
Setting Up a Reflow Oven
If you’re figuring out how to use reflow oven systems in a real SMT line, setup is where wins or headaches usually begin. A lot of defects people blame on solder paste or board design actually start with rushed oven prep. I’ve seen that happen more than once.
First, check the boring stuff. Yes, boring. But it saves hours later.

First setup checklist
Before you run a live board, go through these steps:
- Confirm power and grounding
Make sure the oven matches your site voltage, grounding is correct, and emergency stops work. - Check conveyor width and rail alignment
Your board has to travel flat and steady. If rails pinch or drift, the whole smt reflow oven process gets shaky fast. - Test each heating zone
Run the oven empty and confirm every zone heats as expected. - Inspect airflow and cooling
Uneven airflow often leads to uneven solder joints, especially on dense boards. - Load the right recipe or create one
Your reflow oven manual should give a starting point, but don’t stop there. Fine-tune for your actual board, paste, and components. - Run a learning cycle
Start with a test board before full production. Simple. Smart. Worth it.
We usually tell teams to think of setup as line matching, not just oven startup. The oven has to fit the pace of the printer, pick and place machine, and unload section. If one part runs too fast or too slow, boards stack up and your yield slips.
Common setup problems
Here are a few issues that show up all the time:
| Problem | What it often means | Quick fix |
|—|—|—|
| Board wobbles on conveyor | Rail width or support not set right | Recheck board width and support pins |
| Zones not reaching set temp | Heater issue or bad sensor reading | Inspect heaters and verify sensors |
| Solder looks dull after test run | Profile may be too cold or cooling too fast | Re-profile with thermocouples |
| Boards back up before oven | Line timing mismatch | Adjust conveyor speed or upstream spacing |
Expert Tip: Common setup mistakes usually come from skipping fit checks, rushing the first profile, or assuming the default recipe is good enough. Slow down at the start, and you avoid scrap later.
A good setup also means making space for maintenance access, exhaust routing, and operator safety. Funny enough, teams sometimes focus so much on the thermal profile that they forget the machine still needs to be cleaned, checked, and serviced without turning the floor into an obstacle course. Basic, but real.
For companies upgrading older lines in 2026, integration matters a lot. Sun and Mountain SMT ovens, for example, are often a good fit for EMS and OEM plants that need conveyor compatibility, stable automation, and easier handoff between machines. If you’re replacing a legacy unit, look at footprint, board transfer height, communication signals, and cycle pacing before purchase. That saves a lot of last-minute plant-floor improvising.
Reflow Oven Calibration
Now we get to the part that really separates guesswork from control. Reflow oven calibration is not just about checking whether the screen says 245°C. It’s about knowing what the board actually sees.
In my work with OEM and EMS lines, I’ve seen profiles look perfect on the machine display but still fail on the board because the real heat at component level told a different story. That’s why board-level profiling matters so much.

What you need for calibration
Most teams use:
- Thermocouples
- A multi-channel thermal profiler
- A known-good test board
- Solder paste data sheet
- Your oven’s saved recipe history
The goal is simple. Match the thermal profile to the paste and assembly needs.
Basic calibration flow
Here is a practical way to handle reflow oven calibration:
- Attach thermocouples to key spots on the PCB.
- Send the board through the oven.
- Compare real temperature data with your target profile.
- Adjust zone temperatures or conveyor speed.
- Repeat until preheat, soak, peak, and cooling all land in the right range.
According to this guide on calibration frequency and process control, regular profiling helps reduce drift and keeps solder quality more stable over time. That lines up with what most production engineers already feel in their gut, small drift becomes big scrap if nobody catches it.
What a profile usually controls
| Stage | What happens | Why it matters |
|—|—|—|
| Preheat | Board warms gradually | Helps avoid thermal shock |
| Soak | Flux activates and temps level out | Supports even wetting |
| Reflow | Solder melts and forms joints | Creates electrical and mechanical connection |
| Cooling | Solder solidifies | Affects grain structure and joint finish |
Pro Insight: Higher precision calibration usually comes from measuring the hottest and coolest points on the same board, then tuning for the spread, not just the average. Average numbers can look nice and still hide defects.
If you’re wondering how often to calibrate, the honest answer is, it depends. New product intro, paste change, oven maintenance, seasonal factory shifts, and recurring defects are all good reasons to re-check. Monthly works for some lines. Others need it more often. Especially high-mix production.
PCB Reflow Steps
So, how do you reflow a circuit board in an oven without turning it into a very expensive lesson? You follow the thermal stages and respect the paste window.
The usual PCB reflow steps look like this:
1. Preheat
The board temperature rises in a controlled way. This helps reduce stress on components and starts warming the paste evenly.
2. Soak
This stage gives the board time to level out in temperature. Flux gets active here, and oxidation gets handled before full melt.
3. Reflow
Now the solder reaches liquidus and forms the joints. This is the moment most people think of when they ask how to reflow solder in oven systems, but it’s only one piece of the full process.
4. Cooling
Cooling needs control too. Too fast or too uneven, and joint quality can suffer.
When teams ask how to reflow pcb in oven lines for dense assemblies, I usually say this, don’t chase peak temperature first. Chase the whole curve. A pretty peak with a messy soak is still a messy process.
For double-sided builds, reflow oven double sided pcb work needs extra planning. Usually, the side with smaller or lighter parts goes first, then the second side follows with a tuned profile so parts already soldered stay put. It sounds simple. Sometimes it is. Sometimes it absolutely isn’t.
If you’re running mixed-mass boards with connectors, shields, and tiny passives all on one panel, attach thermocouples to more than one area. One board can act like three different boards thermally. Weird, right?
How to Calculate Reflow Oven Cycle Time
This part gets skipped a lot, but it matters for output planning. If you’re trying to learn how to calculate reflow oven cycle time, think beyond just oven length.
Cycle time depends on:
- Heated length of the oven
- Conveyor speed
- Board spacing
- Board size and thickness
- Required profile time
- Cooling section length
A simple starting formula is:
Cycle time = total travel length ÷ conveyor speed
But that’s only the machine travel time. Real production cycle time also includes loading gap, board spacing, and whether upstream equipment can feed at the same pace.
Quick example
| Item | Value |
|—|—|
| Total oven travel length | 4.5 meters |
| Conveyor speed | 0.9 meters per minute |
| Travel time | 5 minutes |
| Board spacing buffer | 20 seconds |
| Estimated cycle time per board | About 5 minutes 20 seconds |
Now, if your target profile needs a slower conveyor speed, cycle time goes up. That’s the tradeoff. Throughput vs profile quality. And profile quality usually wins, because shipping bad boards faster is not much of a strategy.
In 2026, better planning software and line balancing tools make this easier, but even a basic worksheet can help production teams spot bottlenecks early. If you’re comparing equipment, ask vendors for real throughput ranges based on board type, not just brochure numbers. Sun and Mountain SMT often positions its reflow systems around this kind of practical line-fit conversation, which is what buyers usually need.
Troubleshooting Common Issues
Look, I get it. Even a well-set oven can act up.
The most common problems in the smt reflow oven process usually come down to heat uniformity, airflow, conveyor movement, or profile drift. Here are some of the big ones:
| Issue | Likely cause | What to check |
|—|—|—|
| Cold solder joints | Peak temp too low, poor soak, weak paste | Re-profile, inspect paste condition |
| Tombstoning | Uneven heating or paste imbalance | Review pad design and ramp rate |
| Burnt flux residue | Too much heat or long time above liquidus | Lower peak or shorten reflow time |
| Component shift | Conveyor vibration or paste slump | Inspect conveyor and print quality |
| Random defect spikes | Sensor drift or airflow change | Check calibration and fans |
From Our Experience: The issues that show up most often are not dramatic machine failures. They’re small drifts, fan wear, dirty sensors, or a recipe that was close enough last month but not today. Catching those early saves a lot of pain.
When troubleshooting, don’t change five things at once. Change one variable, test it, and document it. I know, that sounds slower. But it usually gets you to the answer faster.
A maintenance rhythm helps too. Clean flux buildup, inspect fans, verify rails, and profile the oven on a schedule. According to this practical guide to common reflow oven faults, many recurring solder defects trace back to preventable oven faults, not mysterious PCB issues. That doesn’t surprise me at all.
Final Thoughts
Mastering a reflow oven isn’t about memorizing one perfect recipe. It’s about building a stable process, then checking it before small changes turn into expensive defects. If you want better output, start with setup, stay disciplined with reflow oven calibration, and review your smt reflow oven process like it’s a living part of production, because it is.
If you’re choosing new equipment in 2026, look for ovens that fit your real boards, your real throughput, and your real maintenance capacity. Not just the flashiest spec sheet. And if your team is trying to improve line balance, reduce downtime, or tighten process control, it’s worth talking with a supplier like Sun and Mountain SMT about ovens and conveyors that work together from day one.
Simon Scrapes recommends treating reflow as a process discipline, not a one-time machine setting. Teams that profile often, document changes, and train operators well tend to get better yield, steadier output, and fewer ugly surprises on the line.
Published: 26 May 2026
Reading Time: 15 minutes
Reviewer: Simon Scrapes, Founder
You know that moment when your PCB assembly line just clicks into place, and everything really works? That’s where the magic happens in electronics manufacturing. But getting there isn’t luck. Reflow ovens keep the whole show running smoothly, and trust me, you notice when something’s even a few degrees off. Precision soldering and less human error? Sign me up! In 2026, as components get tinier and boards more packed, automated reflow ovens have become the quiet workhorse in every serious SMT line.
Plus, let’s be honest. Nobody misses the headache of hand soldering hundreds of parts, hoping every joint is just right. Automated reflow means better quality, quicker runs, and a lot less fire drill on the plant floor. The real value? Uniform airflow, carefully tuned heat, and the kind of repeatability only cool machines can pull off. That’s how you scale from 100 boards to 10,000, all top quality. And when you’re dealing with that level of throughput, every second and every degree counts (SMT reflow oven basics).
Simon Scrapes is an industry expert in SMT equipment manufacturing with over 10 years of experience. With a deep understanding of reflow oven operations and calibration, Simon has collaborated with leading OEMs and EMS companies to optimize electronic assembly processes.
Why Reflow Ovens Matter in SMT
Let’s break it down. A reflow oven is basically the heartbeat of any SMT (Surface Mount Technology) line. Without it, you can’t go from loose parts to sturdy, working PCBs. Here’s why these machines matter in 2026:
- Precision heat, every run: Modern reflow ovens use zones with carefully staged airflow and heating. That means the solder paste melts perfectly, forming reliable joints for those tricky, high-density boards.
- Less human error: When you’re running hundreds or thousands of boards a day, automation isn’t a luxury; it’s how you keep mistakes and scrap to a minimum.
- Speed and scale: Instead of hand-moving boards between stages, everything flows automatically. Production lines go faster, and teams can focus on tuning processes instead of firefighting problems.
- Adapts to new tech: With everything getting smaller each year, today’s ovens have the controls and recipes to handle whatever next-gen components throw at them (why ovens are key for SMT).
In my work with EMS and OEM partners, the difference before and after upgrading reflow ovens is night and day. Lines that used to struggle with weak joints or failed tests are now turning out reliable boards at a steady clip.
Let’s get this journey started. There’s a lot more to reflow than just “heat it up and go.” Next, we’ll dig into how to set up your reflow oven for clean, consistent results.
Setting Up a Reflow Oven
If you’re figuring out how to use reflow oven systems in a real SMT line, setup is where wins or headaches usually begin. A lot of defects people blame on solder paste or board design actually start with rushed oven prep. I’ve seen that happen more than once.
First, check the boring stuff. Yes, boring. But it saves hours later.
First setup checklist
Before you run a live board, go through these steps:
- Confirm power and grounding
Make sure the oven matches your site voltage, grounding is correct, and emergency stops work. - Check conveyor width and rail alignment
Your board has to travel flat and steady. If rails pinch or drift, the whole smt reflow oven process gets shaky fast. - Test each heating zone
Run the oven empty and confirm every zone heats as expected. - Inspect airflow and cooling
Uneven airflow often leads to uneven solder joints, especially on dense boards. - Load the right recipe or create one
Your reflow oven manual should give a starting point, but don’t stop there. Fine-tune for your actual board, paste, and components. - Run a learning cycle
Start with a test board before full production. Simple. Smart. Worth it.
We usually tell teams to think of setup as line matching, not just oven startup. The oven has to fit the pace of the printer, pick and place machine, and unload section. If one part runs too fast or too slow, boards stack up and your yield slips.
Common setup problems
Here are a few issues that show up all the time:
| Problem | What it often means | Quick fix |
|—|—|—|
| Board wobbles on conveyor | Rail width or support not set right | Recheck board width and support pins |
| Zones not reaching set temp | Heater issue or bad sensor reading | Inspect heaters and verify sensors |
| Solder looks dull after test run | Profile may be too cold or cooling too fast | Re-profile with thermocouples |
| Boards back up before oven | Line timing mismatch | Adjust conveyor speed or upstream spacing |
Expert Tip: Common setup mistakes usually come from skipping fit checks, rushing the first profile, or assuming the default recipe is good enough. Slow down at the start, and you avoid scrap later.
A good setup also means making space for maintenance access, exhaust routing, and operator safety. Funny enough, teams sometimes focus so much on the thermal profile that they forget the machine still needs to be cleaned, checked, and serviced without turning the floor into an obstacle course. Basic, but real.
For companies upgrading older lines in 2026, integration matters a lot. Sun and Mountain SMT ovens, for example, are often a good fit for EMS and OEM plants that need conveyor compatibility, stable automation, and easier handoff between machines. If you’re replacing a legacy unit, look at footprint, board transfer height, communication signals, and cycle pacing before purchase. That saves a lot of last-minute plant-floor improvising.
Reflow Oven Calibration
Now we get to the part that really separates guesswork from control. Reflow oven calibration is not just about checking whether the screen says 245°C. It’s about knowing what the board actually sees.
In my work with OEM and EMS lines, I’ve seen profiles look perfect on the machine display but still fail on the board because the real heat at component level told a different story. That’s why board-level profiling matters so much.
What you need for calibration
Most teams use:
- Thermocouples
- A multi-channel thermal profiler
- A known-good test board
- Solder paste data sheet
- Your oven’s saved recipe history
The goal is simple. Match the thermal profile to the paste and assembly needs.
Basic calibration flow
Here is a practical way to handle reflow oven calibration:
- Attach thermocouples to key spots on the PCB.
- Send the board through the oven.
- Compare real temperature data with your target profile.
- Adjust zone temperatures or conveyor speed.
- Repeat until preheat, soak, peak, and cooling all land in the right range.
According to this guide on calibration frequency and process control, regular profiling helps reduce drift and keeps solder quality more stable over time. That lines up with what most production engineers already feel in their gut, small drift becomes big scrap if nobody catches it.
What a profile usually controls
| Stage | What happens | Why it matters |
|—|—|—|
| Preheat | Board warms gradually | Helps avoid thermal shock |
| Soak | Flux activates and temps level out | Supports even wetting |
| Reflow | Solder melts and forms joints | Creates electrical and mechanical connection |
| Cooling | Solder solidifies | Affects grain structure and joint finish |
Pro Insight: Higher precision calibration usually comes from measuring the hottest and coolest points on the same board, then tuning for the spread, not just the average. Average numbers can look nice and still hide defects.
If you’re wondering how often to calibrate, the honest answer is, it depends. New product intro, paste change, oven maintenance, seasonal factory shifts, and recurring defects are all good reasons to re-check. Monthly works for some lines. Others need it more often. Especially high-mix production.
Calibration and quality standards
This part matters more than people admit. Calibration is not only about better-looking graphs. It helps you hit internal quality targets, customer specs, and audit expectations without last-minute panic.
If your line builds boards for automotive, medical, telecom, or industrial controls, you already know the bar is high. A sloppy profile can lead to weak joints, rework loops, failed inspections, or field returns. None of that is cheap. And none of it feels good on a Friday afternoon.
A smart habit is to document every profile revision, test run, and maintenance event in one place. That record gives production teams a clear trail when someone asks why yield changed this week. It also helps during customer reviews, because you can show process discipline instead of vague guesses. If you’re using a newer oven platform from Sun and Mountain SMT or a similar supplier, built-in recipe storage and line integration can make that paper trail a lot easier to manage.
PCB Reflow Steps
So, how do you reflow a circuit board in an oven without turning it into a very expensive lesson? You follow the thermal stages and respect the paste window.
The usual PCB reflow steps look like this:
1. Preheat
The board temperature rises in a controlled way. This helps reduce stress on components and starts warming the paste evenly.
2. Soak
This stage gives the board time to level out in temperature. Flux gets active here, and oxidation gets handled before full melt.
3. Reflow
Now the solder reaches liquidus and forms the joints. This is the moment most people think of when they ask how to reflow solder in oven systems, but it’s only one piece of the full process.
4. Cooling
Cooling needs control too. Too fast or too uneven, and joint quality can suffer.
When teams ask how to reflow pcb in oven lines for dense assemblies, I usually say this, don’t chase peak temperature first. Chase the whole curve. A pretty peak with a messy soak is still a messy process.
For double-sided builds, reflow oven double sided pcb work needs extra planning. Usually, the side with smaller or lighter parts goes first, then the second side follows with a tuned profile so parts already soldered stay put. It sounds simple. Sometimes it is. Sometimes it absolutely isn’t.
If you’re running mixed-mass boards with connectors, shields, and tiny passives all on one panel, attach thermocouples to more than one area. One board can act like three different boards thermally. Weird, right?
How to Calculate Reflow Oven Cycle Time
This part gets skipped a lot, but it matters for output planning. If you’re trying to learn how to calculate reflow oven cycle time, think beyond just oven length.
Cycle time depends on:
- Heated length of the oven
- Conveyor speed
- Board spacing
- Board size and thickness
- Required profile time
- Cooling section length
A simple starting formula is:
Cycle time = total travel length ÷ conveyor speed
But that’s only the machine travel time. Real production cycle time also includes loading gap, board spacing, and whether upstream equipment can feed at the same pace.
Quick example
| Item | Value |
|—|—|
| Total oven travel length | 4.5 meters |
| Conveyor speed | 0.9 meters per minute |
| Travel time | 5 minutes |
| Board spacing buffer | 20 seconds |
| Estimated cycle time per board | About 5 minutes 20 seconds |
Now, if your target profile needs a slower conveyor speed, cycle time goes up. That’s the tradeoff. Throughput vs profile quality. And profile quality usually wins, because shipping bad boards faster is not much of a strategy.
In 2026, better planning software and line balancing tools make this easier, but even a basic worksheet can help production teams spot bottlenecks early. If you’re comparing equipment, ask vendors for real throughput ranges based on board type, not just brochure numbers. Sun and Mountain SMT often positions its reflow systems around this kind of practical line-fit conversation, which is what buyers usually need.
Troubleshooting Common Issues
Look, I get it. Even a well-set oven can act up.
The most common problems in the smt reflow oven process usually come down to heat uniformity, airflow, conveyor movement, or profile drift. Here are some of the big ones:
| Issue | Likely cause | What to check |
|—|—|—|
| Cold solder joints | Peak temp too low, poor soak, weak paste | Re-profile, inspect paste condition |
| Tombstoning | Uneven heating or paste imbalance | Review pad design and ramp rate |
| Burnt flux residue | Too much heat or long time above liquidus | Lower peak or shorten reflow time |
| Component shift | Conveyor vibration or paste slump | Inspect conveyor and print quality |
| Random defect spikes | Sensor drift or airflow change | Check calibration and fans |
From Our Experience: The issues that show up most often are not dramatic machine failures. They’re small drifts, fan wear, dirty sensors, or a recipe that was close enough last month but not today. Catching those early saves a lot of pain.
When troubleshooting, don’t change five things at once. Change one variable, test it, and document it. I know, that sounds slower. But it usually gets you to the answer faster.
A maintenance rhythm helps too. Clean flux buildup, inspect fans, verify rails, and profile the oven on a schedule. According to this practical guide to common reflow oven faults, many recurring solder defects trace back to preventable oven faults, not mysterious PCB issues. That doesn’t surprise me at all.
Final Thoughts
Mastering a reflow oven isn’t about memorizing one perfect recipe. It’s about building a stable process, then checking it before small changes turn into expensive defects. If you want better output, start with setup, stay disciplined with reflow oven calibration, and review your smt reflow oven process like it’s a living part of production, because it is.
If you’re choosing new equipment in 2026, look for ovens that fit your real boards, your real throughput, and your real maintenance capacity. Not just the flashiest spec sheet. And if your team is trying to improve line balance, reduce downtime, or tighten process control, it’s worth talking with a supplier like Sun and Mountain SMT about ovens and conveyors that work together from day one.
Simon Scrapes recommends treating reflow as a process discipline, not a one-time machine setting. Teams that profile often, document changes, and train operators well tend to get better yield, steadier output, and fewer ugly surprises on the line.
The Role of Temperature Profiles in Reflow
So, let’s get real. If you want clean, robust solder joints and consistent PCB output (no random headaches), mastering temperature profiles in your reflow oven isn’t a “nice to have”—it’s the one thing you can’t ignore. I’ve watched teams fight ugly rework and failed tests, only to realize their default oven profile was kind of a wild guess. Trust me, those random peaks and valleys on the temperature curve will cost you.
A temperature profile is like a recipe your oven follows. It sets when to heat, how much, and for how long during each stage—preheat, soak, reflow, and cooling. And the coolest part? You can tweak this recipe for every board you make. If you’re using the latest Sun and Mountain SMT systems, you get profile controls that zero-in on delicate ICs and chunky connectors. That’s handy for EMS and OEM shops building everything from tiny sensors to big industrial boards.
How Profiles Affect Solder Quality
The thing is, solder paste wants just the right heat treatment. If you go too fast in the preheat, you risk damaging parts. If you melt solder too slow, flux chemistry gets weird and your joints turn grainy. Most lines are running in 2026 with multi-zone convection reflow ovens (like Sun and Mountain SMT’s), so you set different temps for every stage. That means less guessing, more reliable results.
Here’s how each profile stage plays out:
| Stage | What Happens | Consequences |
|———–|————————————-|———————–|
| Preheat | PCB warms up slow | Prevents component stress |
| Soak | Flux activates, temps flatten | Even solder wetting |
| Reflow | Solder melts, bonds form | Strong electrical joints |
| Cooling | Solder solidifies | Joint finish (dull vs shiny) |
I’ve had days where adjusting the cooling ramp just a few degrees changed the entire board’s look and performance. One week, we saw 12% improvement in first-pass yield just by updating profiles after running test thermocouples.
Customizing for Each PCB
Thing is, you can’t copy someone’s profile and expect magic. Every board is different. Dense assemblies, double-sided builds, and weird paste blends all need their own settings. We usually start with the solder paste datasheet, then run test boards with mini thermal sensors on big chips, connectors, and those tiny 0201s. After that, it’s trial, tweak, and retest until you hit target temps on each zone (not just the display, but real thermocouple readings).
Want a bonus? If you use Sun and Mountain SMT ovens, the software lets you store, recall, and fine-tune recipes for every customer board. When an audit comes up or you switch product lines, you just reload the right profile—no drama, no panic.
Expert Tip: If your boards are failing functional tests, check your temperature profile before you chase down paste or layout changes. Most soldering flubs start with thermal mismatch.
Consistency is Key
Uniform temperature and controlled profile shape are what keeps lines humming. Mess up the profile, and you get dull solder, tombstoned parts, or failed joints. Hit it right, and you see repeatable, clean boards every run. According to a breakdown on customizing profiles, matching oven settings to board demands is the main lever for yield and efficiency.
And hey, if you’re not sure your recipe is right? Ask your supplier or tech team for example profiles, but always run your own tests on live boards. What worked in 2026 for a telecom panel isn’t going to work on a sensor module next month.
The Role of Temperature Profiles in Reflow
So, let’s get real. If you want clean, strong solder joints and steady PCB output, temperature profiles are where the smt reflow oven process either works or falls apart. I’ve seen teams blame paste, parts, even the board finish, then find out the real issue was a profile that looked OK on screen but was wrong on the board.
A temperature profile is the heat path your assembly follows from start to finish. It tells the oven how fast to ramp, how long to soak, when to hit peak, and how to cool. Simple idea. Big impact.
For anyone learning how to use reflow oven systems well in 2026, this is the part to take seriously. You are not just heating metal. You are managing flux activity, solder wetting, component stress, and final joint shape all at once.
What a good temperature profile does
A solid profile helps you:
- warm the board at a safe rate
- activate flux without burning it off too early
- reach full solder melt across light and heavy parts
- avoid overheating sensitive components
- cool in a controlled way for better joint structure
Here is a quick view:
| Profile stage | Main job | If it goes wrong |
|—|—|—|
| Preheat | Raise board temp gradually | Parts may crack or shift from thermal stress |
| Soak | Even out temperature across the PCB | Some joints may wet poorly |
| Reflow | Push solder above liquidus | Cold joints or incomplete bonding can show up |
| Cooling | Let solder solidify in control | Joint finish and long-term strength may suffer |
We learned this the hard way on a mixed-mass board run with shields on one side and tiny passives on the other. The center of the board looked perfect, but the cooler edge never quite got there. After we moved thermocouples and retuned two zones, yield improved fast. Not magic. Just better data.
Why one profile does not fit every board
This is where people get tripped up. A saved recipe from one product often won’t work for the next one, even if the boards look similar at a glance. Board thickness, copper weight, component density, paste type, and connector mass all change heat behavior.
So if you’re trying to figure out how to reflow a circuit board in an oven, start with the solder paste data sheet and your board layout, then test on the actual assembly. Not a random sample board from six months ago.
According to this clear guide on reflow solder profiles, profile shape and time above liquidus directly affect soldering outcomes. That tracks with what we’ve seen on the line. Small timing errors can create ugly defects that seem random, until you map the real board temperature.
If you’re using Sun and Mountain SMT equipment, recipe storage and zone-level tuning can make this easier, especially for EMS teams running high-mix work. You still need to validate every new board, of course. But better controls save time.
Practical profile tuning tips
Here’s what actually helps when tuning a profile:
- Put thermocouples on the hottest and coolest spots.
- Check large connectors, BGAs, and small passives, not just the board center.
- Watch ramp rate and time above liquidus together.
- Change one setting at a time.
- Save the final recipe with board revision notes.
Expert Tip: If a board passes visual inspection but fails electrical test, profile spread is often the hidden problem. Check the coldest spot first, not just the peak number.
And yes, cooling matters too. People love talking about peak temperature because it sounds dramatic. But bad cooling can still leave you with rough-looking joints or warped results. Annoying stuff.
How to Calculate Reflow Oven Cycle Time More Accurately
Now let’s tackle the planning side. If you’re asking how to calculate reflow oven cycle time, the short formula is useful, but it is only the starting point. Real output depends on machine travel, board gap, profile needs, and line balance.
The base math looks like this:
Cycle time = total oven travel length ÷ conveyor speed
That gives you travel time through the machine. But your true production pace also depends on how closely boards can be loaded, whether the upstream placer can keep up, and whether the profile forces a slower belt speed.
What affects cycle time most
A few factors usually drive the number:
- total heated and cooling length
- conveyor speed
- required time in each thermal stage
- board length and thickness
- spacing between boards
- product mix on the line
- unload and buffer handling
Here is a more useful planning table:
| Factor | Pushes cycle time up when… | Why it matters |
|—|—|—|
| Conveyor speed | The profile needs a slower belt | Boards stay in zones longer |
| Board spacing | Parts are tall or heat-sensitive | You need extra gap between boards |
| Board mass | Thick copper or heavy connectors are used | More energy and longer profile time may be needed |
| Product mix | Many different assemblies run on one line | Frequent recipe changes slow flow |
| Line balance | Upstream tools feed unevenly | The oven waits, or boards bunch up |
A simple worked example
Say your oven travel length is 5.4 meters and the conveyor speed is 0.9 meters per minute.
5.4 ÷ 0.9 = 6 minutes travel time
Now add a 25-second loading gap between boards.
Your practical cycle time per board becomes about 6 minutes 25 seconds.
But wait, here’s the catch. If the board is thick and your profile needs the speed dropped to 0.75 meters per minute, travel time jumps to 7 minutes 12 seconds before you even add spacing. That’s a big deal for capacity planning.
Tools that help with better estimates
You do not need fancy software to start, but a few tools help a lot:
- thermal profiling software
- thermocouples
- conveyor speed calculator
- line balancing worksheet
- recipe history from your reflow oven manual
A practical overview from SMT Machine Line’s guide to using a reflow oven well points out that conveyor speed and profile tuning work together, not separately. That’s exactly right. Chasing faster output without checking thermal needs is how lines create hidden defects.
For buyers comparing ovens in 2026, this matters during equipment selection too. A machine that looks fast in a brochure may still bottleneck your line if your real boards need slower profiles. That is one reason some EMS and OEM teams look at Sun and Mountain SMT systems as part of a full line-fit review, not just a single machine purchase.
Throughput vs quality, which wins?
Honestly, quality wins almost every time. Or at least it should.
If you speed up the belt and cut time too hard, you may hit your hourly target and still lose money to rework, scrap, or field returns. We’ve all seen that false win before. The smarter move is to find the fastest stable process, document it, and build planning around that number.
So when you calculate cycle time, use two numbers:
- Machine travel time for basic reference
- Real production cycle time for scheduling and quoting
That second number is the one your plant manager, customer, and sanity probably care about most.
Common Reflow Defects and How to Fix Them
You know that moment when the line seems perfect, but a stack of boards comes out with cold joints or somebody shouts, “What happened to yield yesterday?” Yeah, that’s the stuff nobody wants. Even the best reflow oven set up can end with defects if something subtle goes wrong. Let’s check out the most common reflow problems and how to squash them before they hit your numbers.
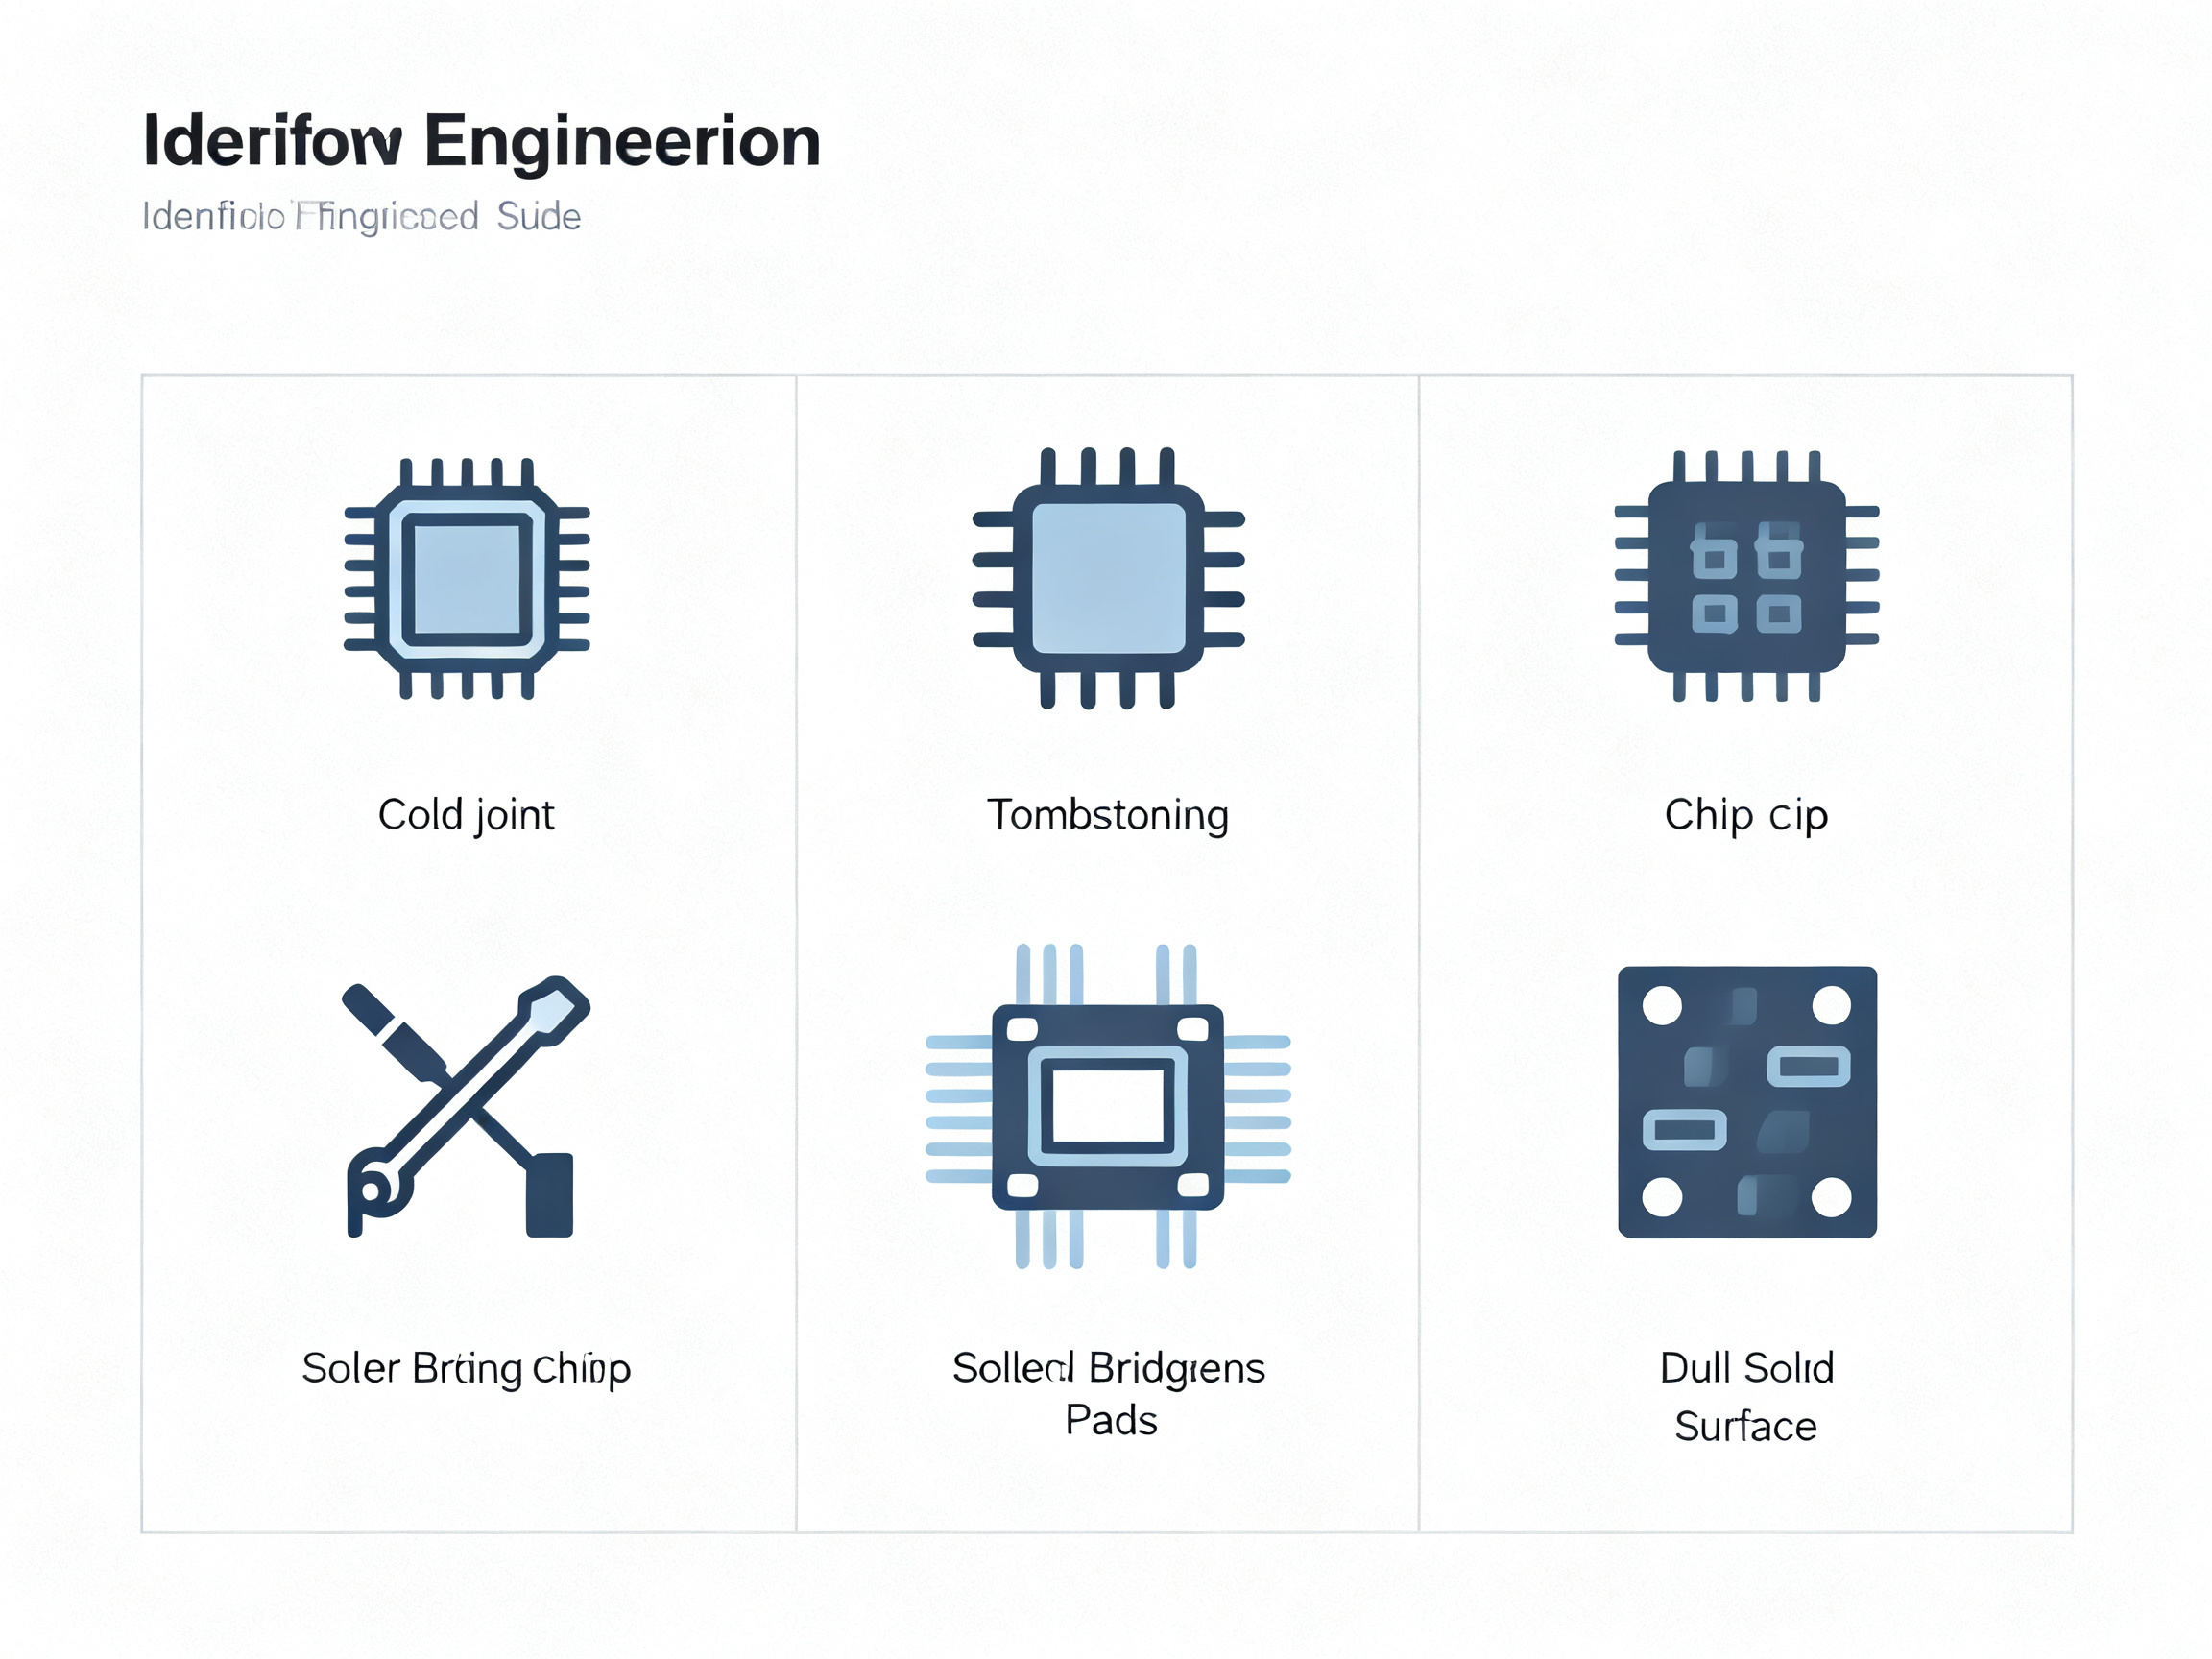
Typical Soldering Defects (and Why They Show Up)
- Cold joints – Usually caused by not enough heat in the reflow stage, or the soak wasn’t quite right. The fix? Double-check your zone calibration and re-profile with real thermocouple data (the display isn’t enough).
- Tombstoning – That classic moment when small chips tip up like tiny gravestones. Most often, uneven heating or unbalanced paste. Slow down the ramp rate or tweak the profile if you spot it.
- Bridging – Solder jumps across pads. It can be too much paste, but sometimes it’s fast/reckless heating. Use proper stencil and revise soak if needed.
- Blowholes and outgassing – Sometimes boards look bubbly or porous at joints. Check for excess moisture in PCBs, and tune the preheat so boards outgas gently.
- Dull or grainy solder – Usually, this means over-cooling or dirty paste. A tweak of cooling and a paste re-check usually gets it done (see defect trends and solutions in this industry guide).
Step-by-Step Solutions for Yield Bumps
- Profile everything—Not just the first setup but weekly or whenever a variable shifts (new board, new paste). One line I saw doubled yield after moving from “once a quarter” to routine real-life profiling.
- Check the paste, not just the profile—Your oven can only do so much. Expired, separated, or poorly stored paste is a quiet killer.
- Clean airflow and sensors—Dusty ovens mean uneven heat. We make it part of our shift-change huddle to check vents and sensors—seriously made more difference than anyone expected.
- Don’t copy-paste recipes—Each board, each run, even each side for double-sided builds. Profile, save, rerun with tweaks.
- Use visual and electrical tests—Some defects look OK under a magnifier but fail in circuit. If yield drops, run an electrical test panel even if visually all looks well.
Preventive Maintenance: Your Defect Minimizer
It’s easy to skip until something breaks. But regular care is what separates a hectic line from a steady one. Here’s what works:
- Clean out flux and dust weekly—Inside the tunnel, fans, and conveyors. We keep a log and, guess what? Fewer random shutdowns.
- Calibrate sensors every month—Consistency is what keeps zones honest, and honest zones save boards.
- Replace or service fans and heaters—If you hear a weird noise or see odd temp readings, check it out before you get a scrap parade.
- Document all tweaks—When someone changes a recipe or maintenance gets done, jot it down. We had an “old school” whiteboard for a while until Sun and Mountain SMT’s software made logging a breeze.
According to JT-International’s maintenance list, checking for loose rails, cleaning cooling sections, and regularly reviewing profile data is one of the main ways EMS and OEM plants avoid sudden defects.
Expert Tip: When yield dips, first check what’s changed since your last good run. Was there a solder paste delivery, maintenance cycle, or recipe edit? Sorting out root cause is easier if your logs are clear.
One tangent—sometimes, a simple sticker over a temp sensor causes wild results for hours. No kidding. The big wins come from small habits.
Real World Rescue Example
Once, on a run for a new sensor board in 2026, our line saw dull joints all week. The “fix” turned out to be cleaning a clogged exhaust filter and tweaking zone four up just two degrees. Yield bounced from 85% to 97% in half a day. It’s almost always the basics—stick to them.
Upgrading Equipment for Fewer Surprises
If these problems are routine, it might be your tech that’s holding you back. Newer ovens like Sun and Mountain SMT’s models allow real-time temperature logging, automatic profile storage, and easier line integration. That means less blame game and more answers—especially in bigger, multi-product factories.
Cleaning routines, smart recipe storage, and routine calibration are three things plant managers in 2026 swear by. And it doesn’t have to cost new equipment every year. Just good process.
If you want peace of mind (and to stop getting texts at 11 p.m. about a batch of bad boards), try small weekly checks and monthly full profiles. Works for us. Works for most teams that survive in “zero defect” applications, too.
Key Takeaways & Expert Recommendations
So, wrapping it all up, what really matters when you’re aiming to master reflow ovens in 2026? I’d say it comes down to owning your process, not just running your equipment. Every single step—setup, calibration, profiling, maintenance—adds up to the end result: reliably strong, clean solder joints and happy production managers (who aren’t getting 2 a.m. panic texts).
Here’s what stands out:
- Get obsessed with your temperature profiles
Good enough doesn’t cut it anymore, especially for EMS and OEM teams chasing higher yield and fewer surprises. Build, test, adjust, and save the best fits for each board, and trust those test data runs over what the display says. - Calibrate on a rhythm, not just when you feel like it
Regular checks (monthly is a solid default for busy lines) with real boards and thermocouples catch drift before headaches start. It’s not exciting, but it’s how the best lines keep high first-pass yield. - Maintenance beats firefighting every time
Cleaning out those ovens, recalibrating sensors, and documenting changes pays off faster than flashy upgrades. The boring stuff? It keeps the boards rolling. - Don’t treat one recipe as gospel
Test and tweak for every new assembly, new paste, or product shift. That’s how you avoid mysterious defects like cold joints or tombstoning when ramping up a new batch. - Invest where it counts
Reliable reflow gear, like Sun and Mountain SMT’s 2026 systems, gives you not just smart profiles and logging, but less downtime and fewer line stops. It’s not about buying the shiniest tool, but about picking what fits your boards and your real process needs.
Expert Tip: Always track what changes—recipes, paste type, board thickness, line balancing. When yield drops, those notes save hours (or days) compared to guessing.
And one last thought—I don’t have all the answers, but the best lines I’ve worked with are always curious, always experimenting, always learning from both wins and screw-ups. Keep the process moving, get everyone involved (yes, even maintenance and operators), and use that feedback loop fast.
If you want more info or need case-specific help fitting a reflow oven into your line (especially if you’re scaling up in Asia, North America, or Europe), Sun and Mountain SMT can walk through options without corporate jargon—just real, honest advice for 2026 production reality.
Stay curious, keep adjusting, and may your boards leave the oven clean and perfect. Happy reflowing!
If you need a breakdown on how to use reflow oven settings, troubleshoot defects, or step up your calibration game, check out this comprehensive guide to reflow oven techniques for 2026 for practical walk-throughs and planning tips.
Simon Scrapes recommends treating reflow as a process discipline, not a one-time machine setting. Teams that profile often, document changes, and train operators well tend to get better yield, steadier output, and fewer ugly surprises on the line.