
Published: 25 May 2026
Reading Time: 10 minutes
Reviewer: Manufacturing Engineer, SMT Technology Specialist
You know that feeling when a tiny SMD part shifts by half a millimeter, and suddenly the whole board is suspect? In PCB assembly, little errors get expensive fast. That’s why reflow soldering matters so much. It gives manufacturers, engineers, and even careful hobbyists a repeatable way to join parts to a board without the mess and guesswork of hand soldering every pin.
At its core, reflow soldering is the process of placing components onto solder paste, then heating the PCB in a controlled way until the paste melts and forms solid joints. It is widely used in SMT production because it supports small parts, dense layouts, and steady output across batch after batch, as explained in this guide to reflow soldering and PCB assembly. That control is a big deal. A good reflow soldering temperature profile can help cut tombstoning, cold joints, voids, and other defects that slow production down.
But here’s the thing. Heat alone is not the whole story. Timing matters too. A reflow oven temperature profile has to move through stages like preheat, soak, reflow, and cooling at the right pace. If the board heats too fast, parts can crack or shift. If it stays too cool, the solder may not wet well. In real production, that means scrap, rework, delays, and annoyed teams on the line.
And this is not just factory talk anymore. In 2026, reflow soldering at home keeps growing because DIY builders can get solid results with a small soldering oven, hot plate, or even a modified toaster setup. For prototypes and short runs, diy reflow soldering often feels more practical than hand soldering tiny QFN or 0402 parts one by one. It can also be cheaper, which is probably why so many makers keep trying it, even after a few slightly crispy first boards.
Jace Liu is a seasoned expert in electronics manufacturing processes with extensive experience in Surface Mount Technology, SMT, equipment optimization. Jace has conducted workshops and authored guides on precision soldering techniques, aiding both professionals and hobbyists in achieving seamless PCB assembly results.
Understanding and Optimizing the Reflow Soldering Temperature Profile
Ever wonder why one reflow soldering run nails every joint, but the next looks like a rookie science fair project? It almost always comes down to the profile. That is the sequence of temperatures your soldering oven uses as the board moves from cold to completed.
What is a Reflow Temperature Profile, Really?
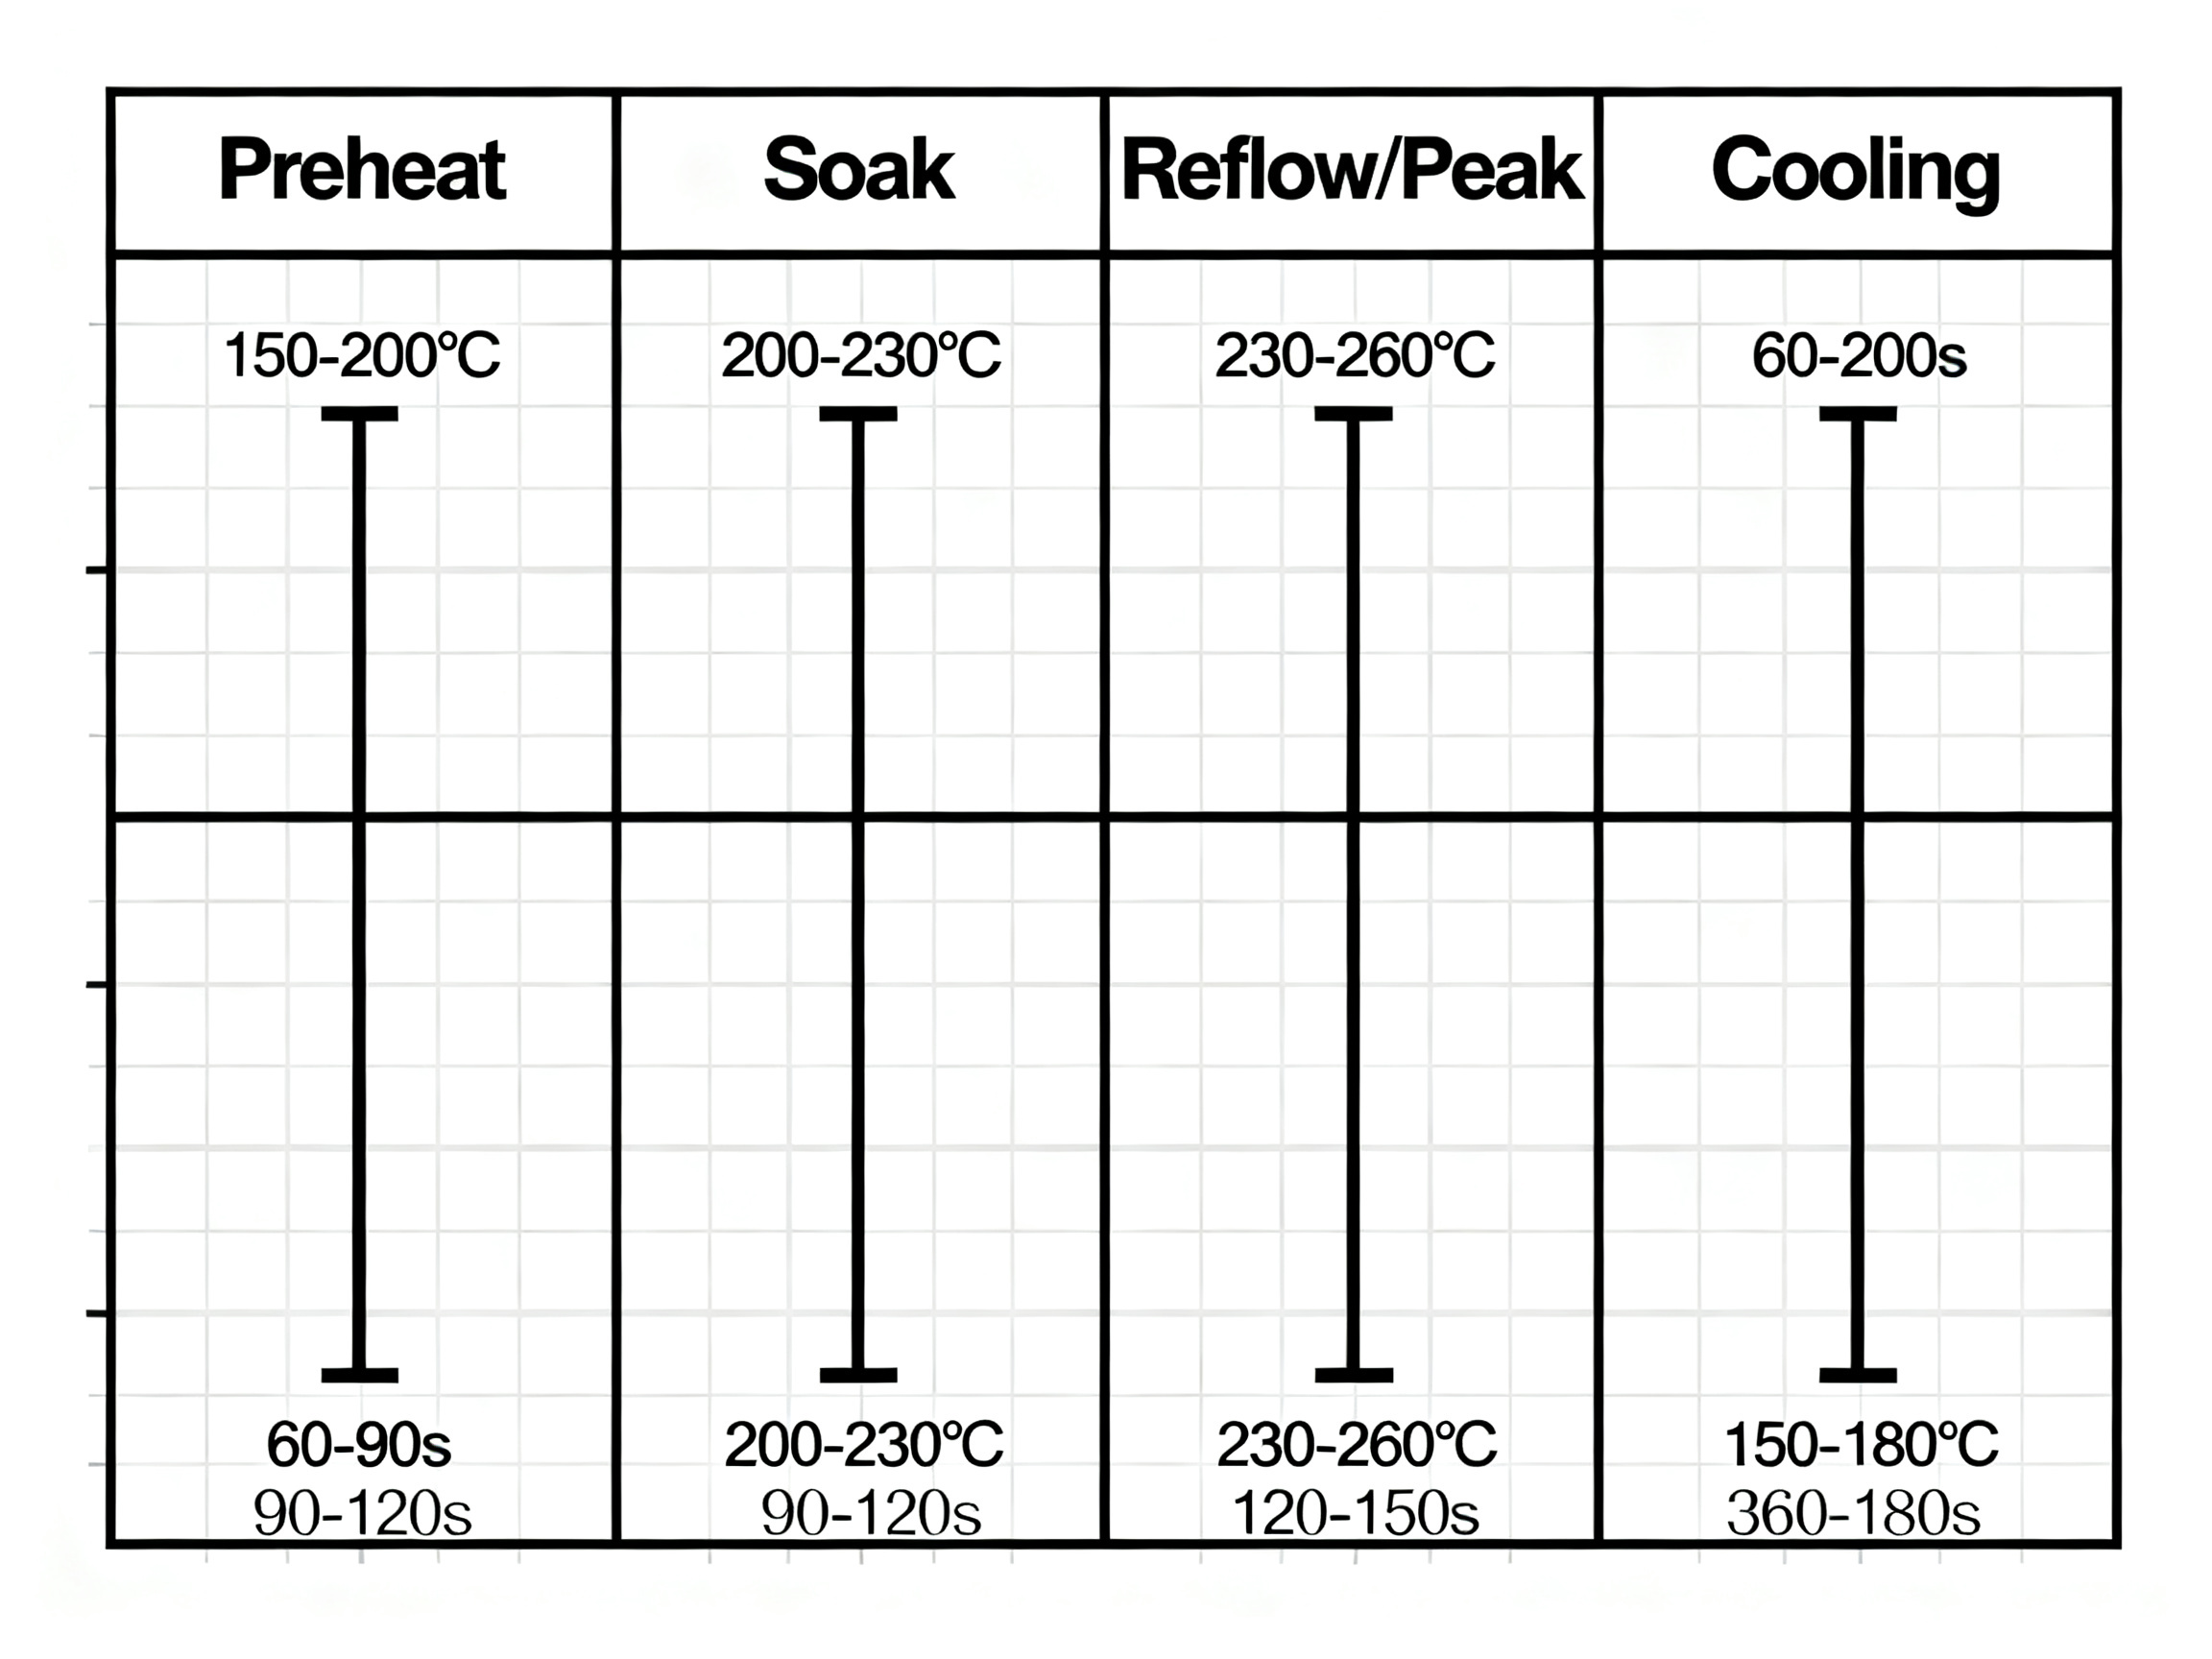
A reflow temperature profile is a planned recipe for how hot your board gets, how fast it heats, how long it soaks, and the timing of each stage. And yes, timing needs to be just right. If you picture a reflow profile graph, you will see it rise through the preheat, soak, reflow, and cooling regions: each part forms a slope or plateau at a specific temperature range for a set amount of time.
Key parameters include:
- Soak time: The stretch spent in the mid-heating zone, where flux works and parts get even
- Peak temperature: The highest point, usually matching your solder alloy specs
- Time above liquidus (TAL): How long the solder stays melted—enough to fully wet, but not long enough to fry the board
This whole dance matters because tiny differences in heating or cooling can mean the difference between strong, shiny joints and a bin full of trash boards.
Optimizing Reflow for Different Solders
Think all solder acts the same? Not in 2026. Leaded and lead-free pastes have distinct needs. Lead-free reflow profiles, for example, need higher peak temperatures—sometimes up to 250°C—because modern, RoHS-compliant alloys melt later than their older, leaded cousins. That means soak and ramp-up stages must be a bit longer and gentler, so you do not fry tiny chips.
If you work off-the-shelf, sample profiles from your solder vendor, or your pcb soldering oven manual, you will notice they recommend different zones and times for different chemistries. It is smart to calibrate your own oven with practice boards, tweaking soak duration and peak temp until joints look right.
DIY Reflow Soldering Tips
If you’re trying reflow soldering at home, welcome to the club. It can feel a little sketchy at first. Then it clicks, and suddenly tiny SMD boards stop feeling impossible.
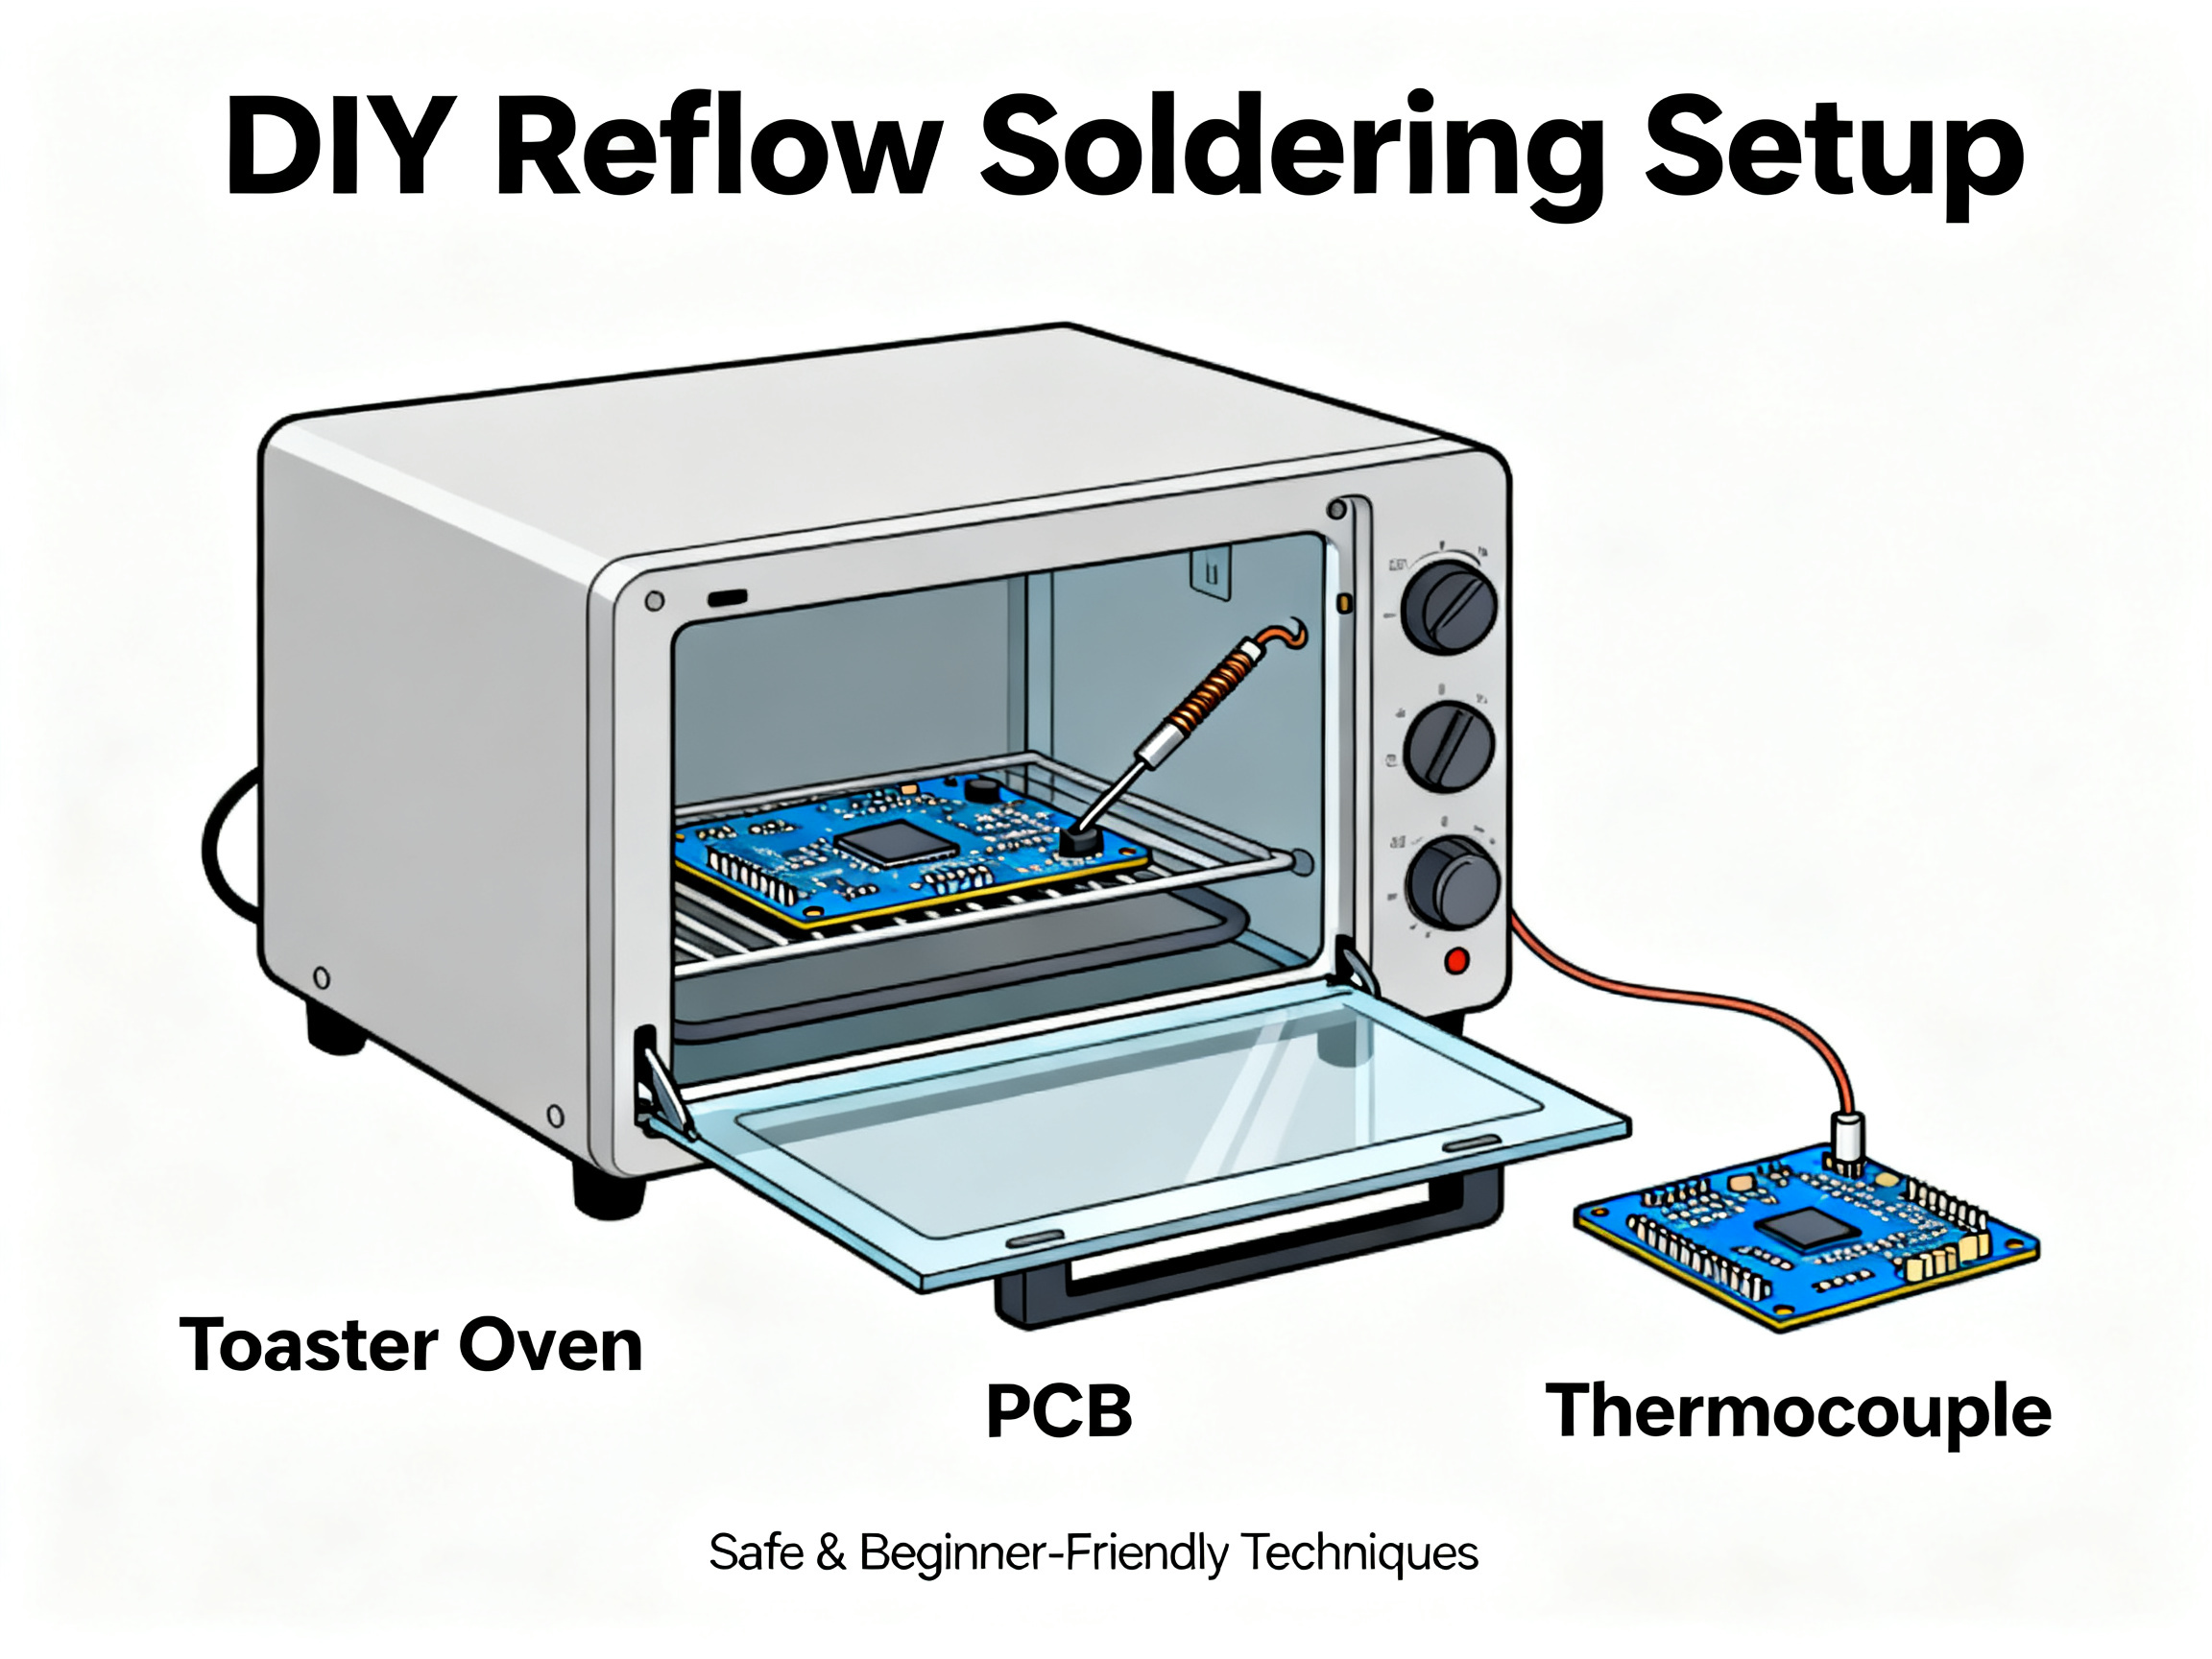
Building Your Own Reflow Rig: What Actually Works
Let’s get real: You do not need a six-zone SMT reflow oven to start. Here are the usual suspects for home setups:
- Toaster oven mod: Still a fan favorite. Rip out the old controls, add a thermocouple, and pair it with a cheap controller board.
- Hot plate: Best for small boards or folks worried about smoke indoors.
- Hot air rework station: Handy for single parts or repairs, but not ideal for whole boards.
Common Reflow Defects, and Why They Happen
This is where reflow soldering explained becomes very real. Most defects do not show up because one thing failed. Usually, it is a stack of small issues—profile mistakes, paste volume imbalance, or cooling hiccups.
Common defects include:
- Tombstoning: Caused by uneven heating or paste issues.
- Cold joints: Resulting from low peak temperature.
- Voids: Air pockets due to outgassing or weak paste behavior.
With profile adjustments, many of these defects can be prevented before a batch turns into scrap.
Final Thoughts
Reflow soldering can look intimidating at first—tiny parts, exact heat windows, weird defects, all of it. But, once you understand the stages, the reflow temperature profile, and why machine stability matters so much, the process becomes less mysterious. Whether you’re soldering boards at home or running production, precision and repeatability are key.
Jace Liu’s view is straightforward: strong PCB assembly results usually come from disciplined thermal profiling, stable equipment, and small process corrections made early, before defects turn into expensive habits.