
Published: 25 May 2026
Reading Time: 12 minutes
Reviewer: Simon Scrapes, Founder
Introduction to Reflow Ovens for SMT Soldering
Ever wondered how your phone, laptop, or car electronics get those impossibly tiny components perfectly attached to circuit boards? Spoiler alert: it is not magic. It is reflow soldering, and at the heart of that process sits a machine that gets crazy hot, follows precise temperature patterns, and does the heavy lifting when it comes to creating reliable electrical connections.
Reflow ovens are temperature-controlled machines that heat printed circuit boards through a sequence of heating zones. Here is how reflow soldering works in practice. First, solder paste gets applied to the board pads, then components get placed on top, and finally the board travels through the reflow oven where controlled heat melts that paste into a permanent bond. The whole thing sounds simple, but getting it right? That is where things get interesting.
Modern electronics manufacturing relies heavily on automation and precision. We are talking about components so small that human hands simply cannot place them consistently enough for mass production. Reflow ovens solve this by following exact temperature profiles that ensure every single joint meets quality standards. No guesswork, no human error creeping in at 2am when attention fades.
So why should you care about mastering a reflow oven? Three big reasons. One, you gain serious control over production quality. Two, you can optimize cycle times and pump out more boards without sacrificing reliability. Three, you understand why things go wrong when they do, and trust me, something always goes wrong eventually.
This guide walks you through everything from understanding how these machines work to programming profiles, troubleshooting issues, and squeezing every bit of efficiency out of your production line. Whether you are running a small electronics shop or managing a full-scale manufacturing floor, understanding reflow ovens makes you better at what you do.
Jace Liu is an experienced production engineer specializing in surface mount technology (SMT). With over a decade of hands-on expertise operating and programming reflow ovens, Jace has worked with industry leaders, pioneering precision-focused and highly efficient electronics manufacturing solutions.
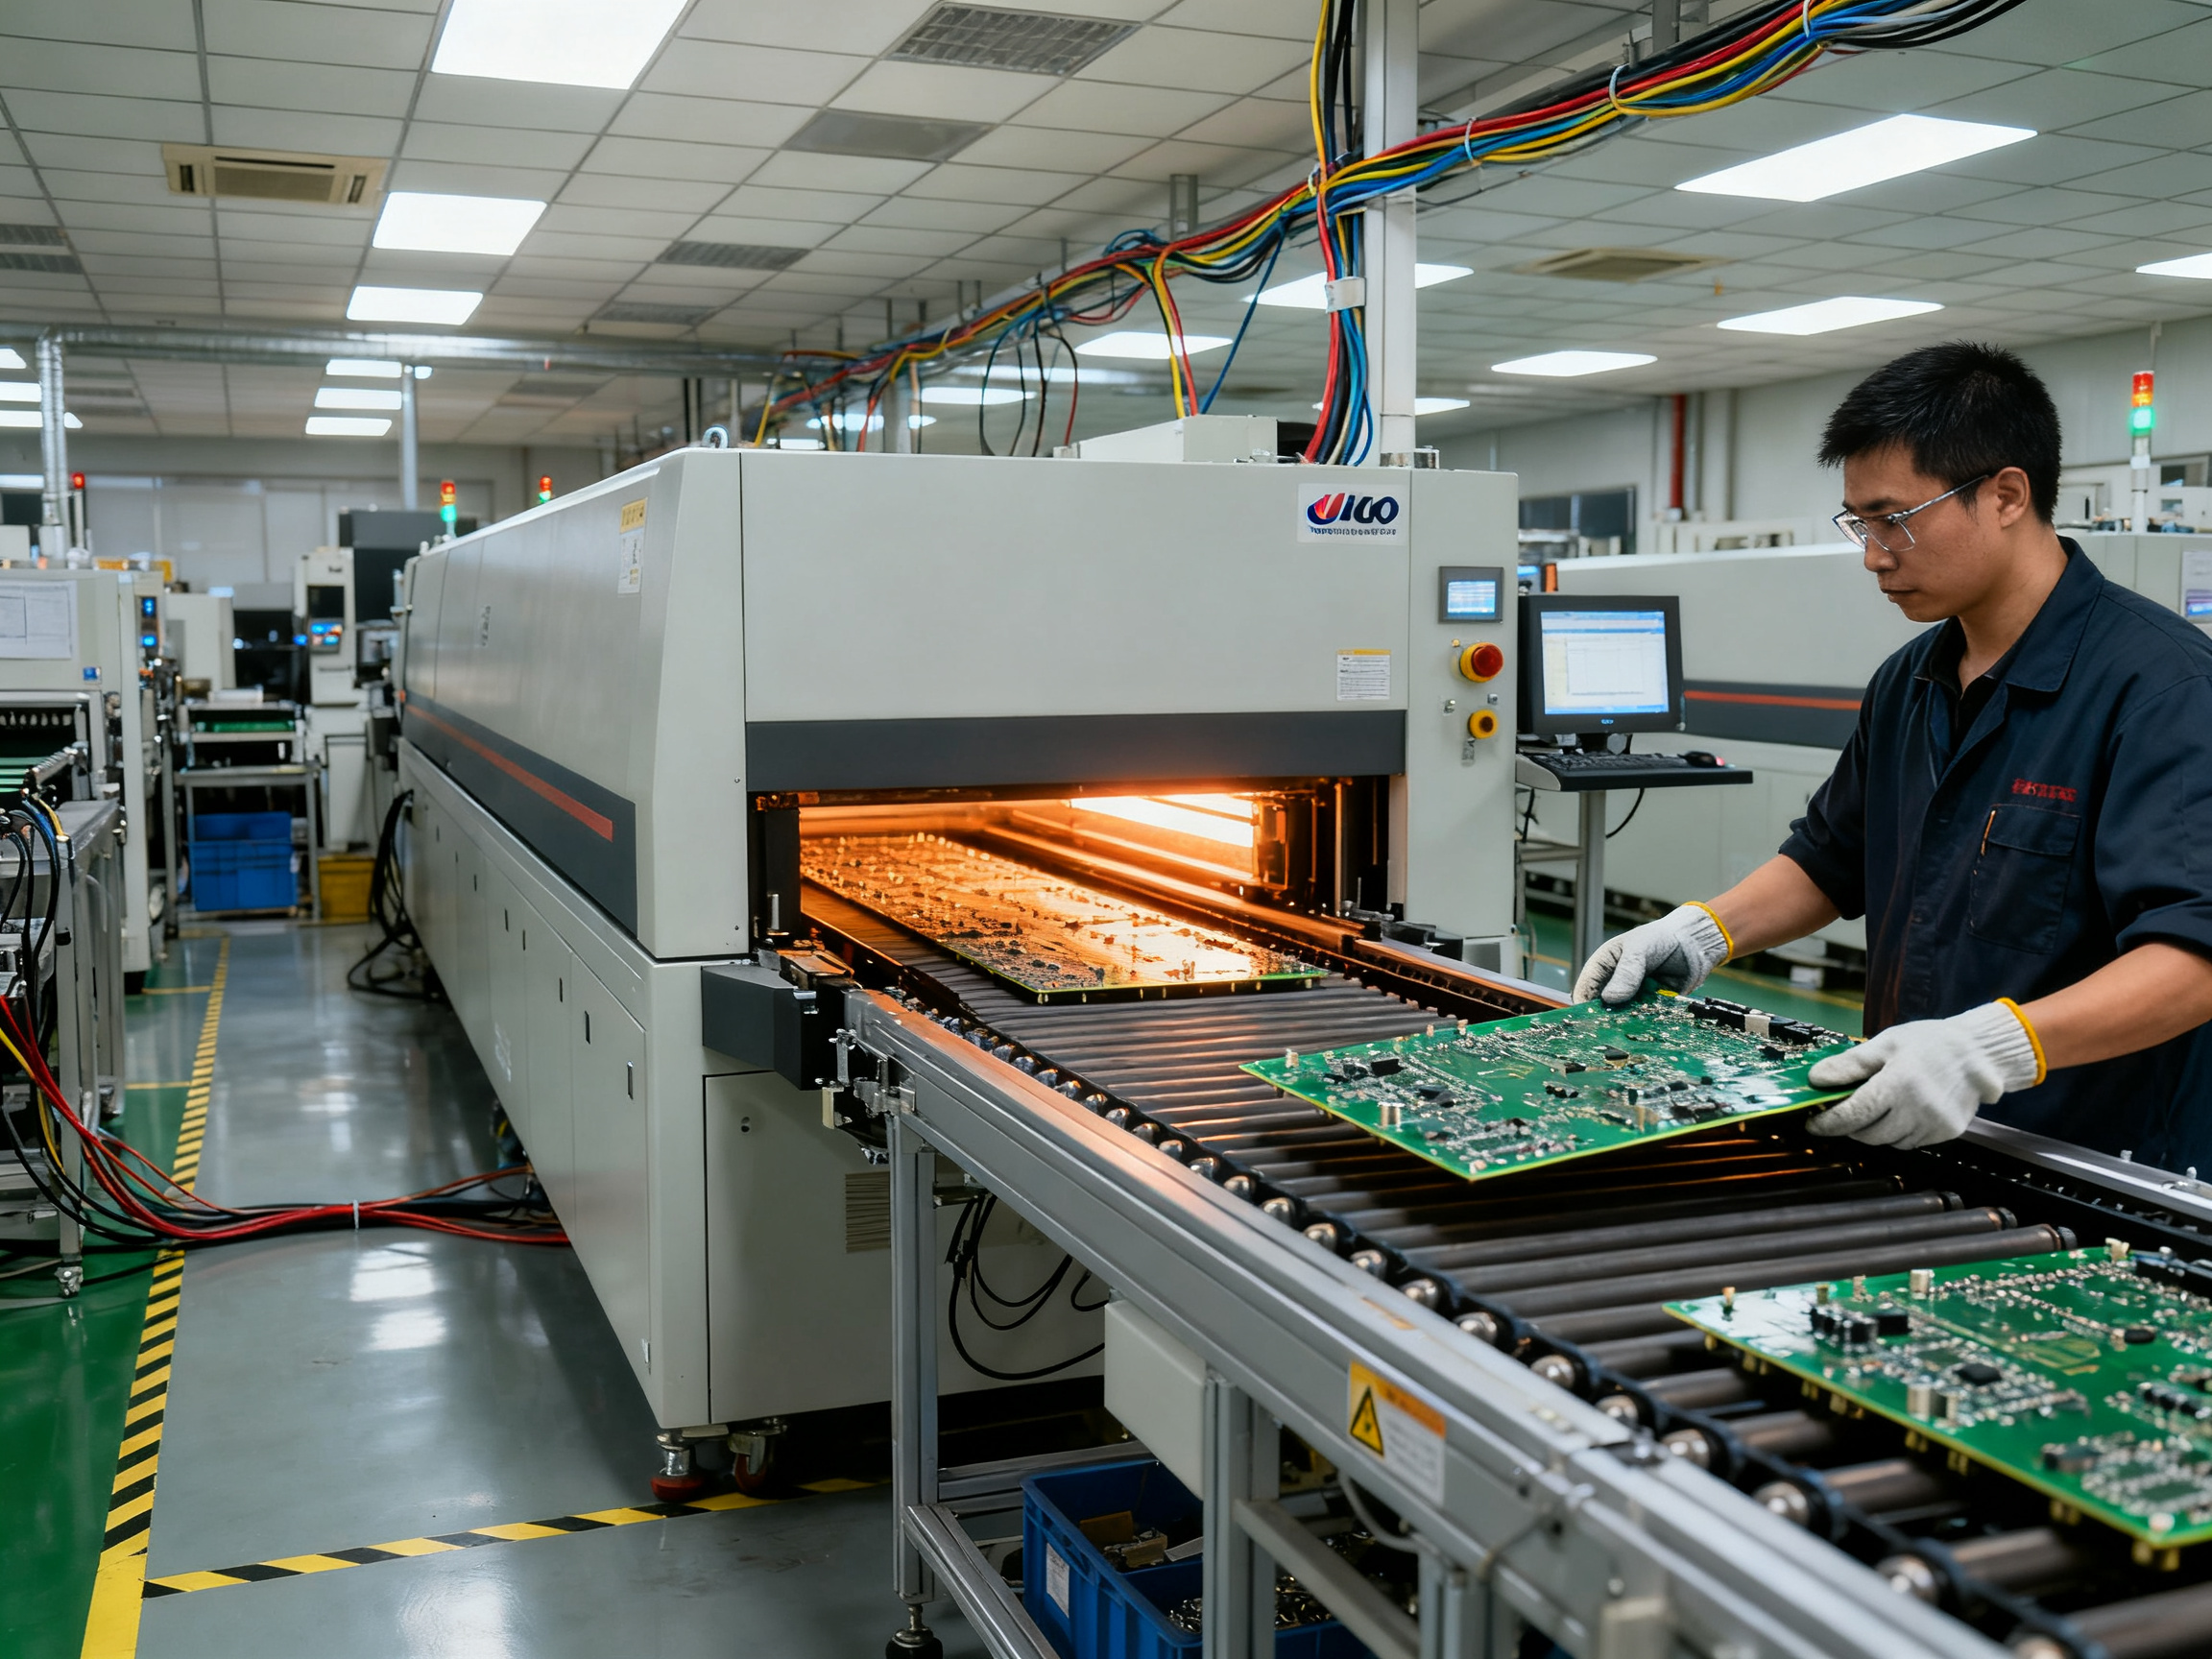
How Does a Reflow Oven Work? Overview of the Process
Think of a reflow oven as a very precise conveyor belt through a series of temperature zones. The board goes in one end, travels through different heating stages, and comes out the other with perfectly soldered components. Simple concept, but the engineering behind it is pretty impressive.
Most reflow ovens in 2026 feature a conveyor system that moves PCBs through multiple heating zones, plus a cooling section at the end. The number of zones matters more than you might think. Entry-level models offer 4 to 6 zones, while production-grade machines from manufacturers like Sun and Mountain SMT typically feature 8 to 12 zones for superior temperature control. More zones mean you can fine-tune the thermal profile with greater precision, which becomes crucial when working with heat-sensitive components or large boards with varying thermal masses.
The Four Temperature Zones
Preheat Zone: The board enters and gradually warms up. This stage activates the flux in the solder paste and evens out the board temperature before things get serious. Rushing this step leads to thermal shock and defects later on.
Soak Zone: Temperature holds steady in the 150 to 200 degree Celsius range. This allows the board and components to reach thermal equilibrium. Think of it as letting everything warm up together so nothing stresses out when peak heat hits.
Reflow Zone: Here is where the magic happens. The oven ramps temperatures above the solder melting point, typically 217 to 250 degrees depending on your paste. The solder liquefies and wets the component leads to the pads, forming the electrical connection.
Cooling Zone: The board exits through a controlled cooldown. Solidification happens gradually, which prevents brittle joints or thermal stress cracking. Too fast and you get problems; too slow and you slow down production.
Pro Insight: Heat profiling determines everything. A poorly optimized profile causes tombstoning, cold joints, or voiding. Most reflow ovens get surprisingly hot, reaching 250 to 300 degrees Celsius at peak. Getting the slope and soak times right for your specific board assembly matters more than hitting exact temperatures.
The whole reflow soldering process takes roughly 4 to 8 minutes from start to finish, depending on board size, component density, and the profile you are running. Modern ovens with AI-assisted thermal management can adapt in real-time, making adjustments based on feedback from embedded sensors throughout the heating chamber.
Understanding how a reflow oven works at this level helps you diagnose problems when they pop up. And trust me, they will pop up eventually. Knowing what each zone does means you can look at a failed joint and have a pretty good idea which stage went sideways.
Learn more about SMT reflow oven technology and how each heating zone contributes to quality solder joints.
How to Use a Reflow Oven: Step-by-Step Guide
Getting a reflow oven running properly takes a bit of prep work. Skip this part and you will waste time, ruin boards, or worse. Here is how to do it right.
Step 1: Inspect and prepare your board.
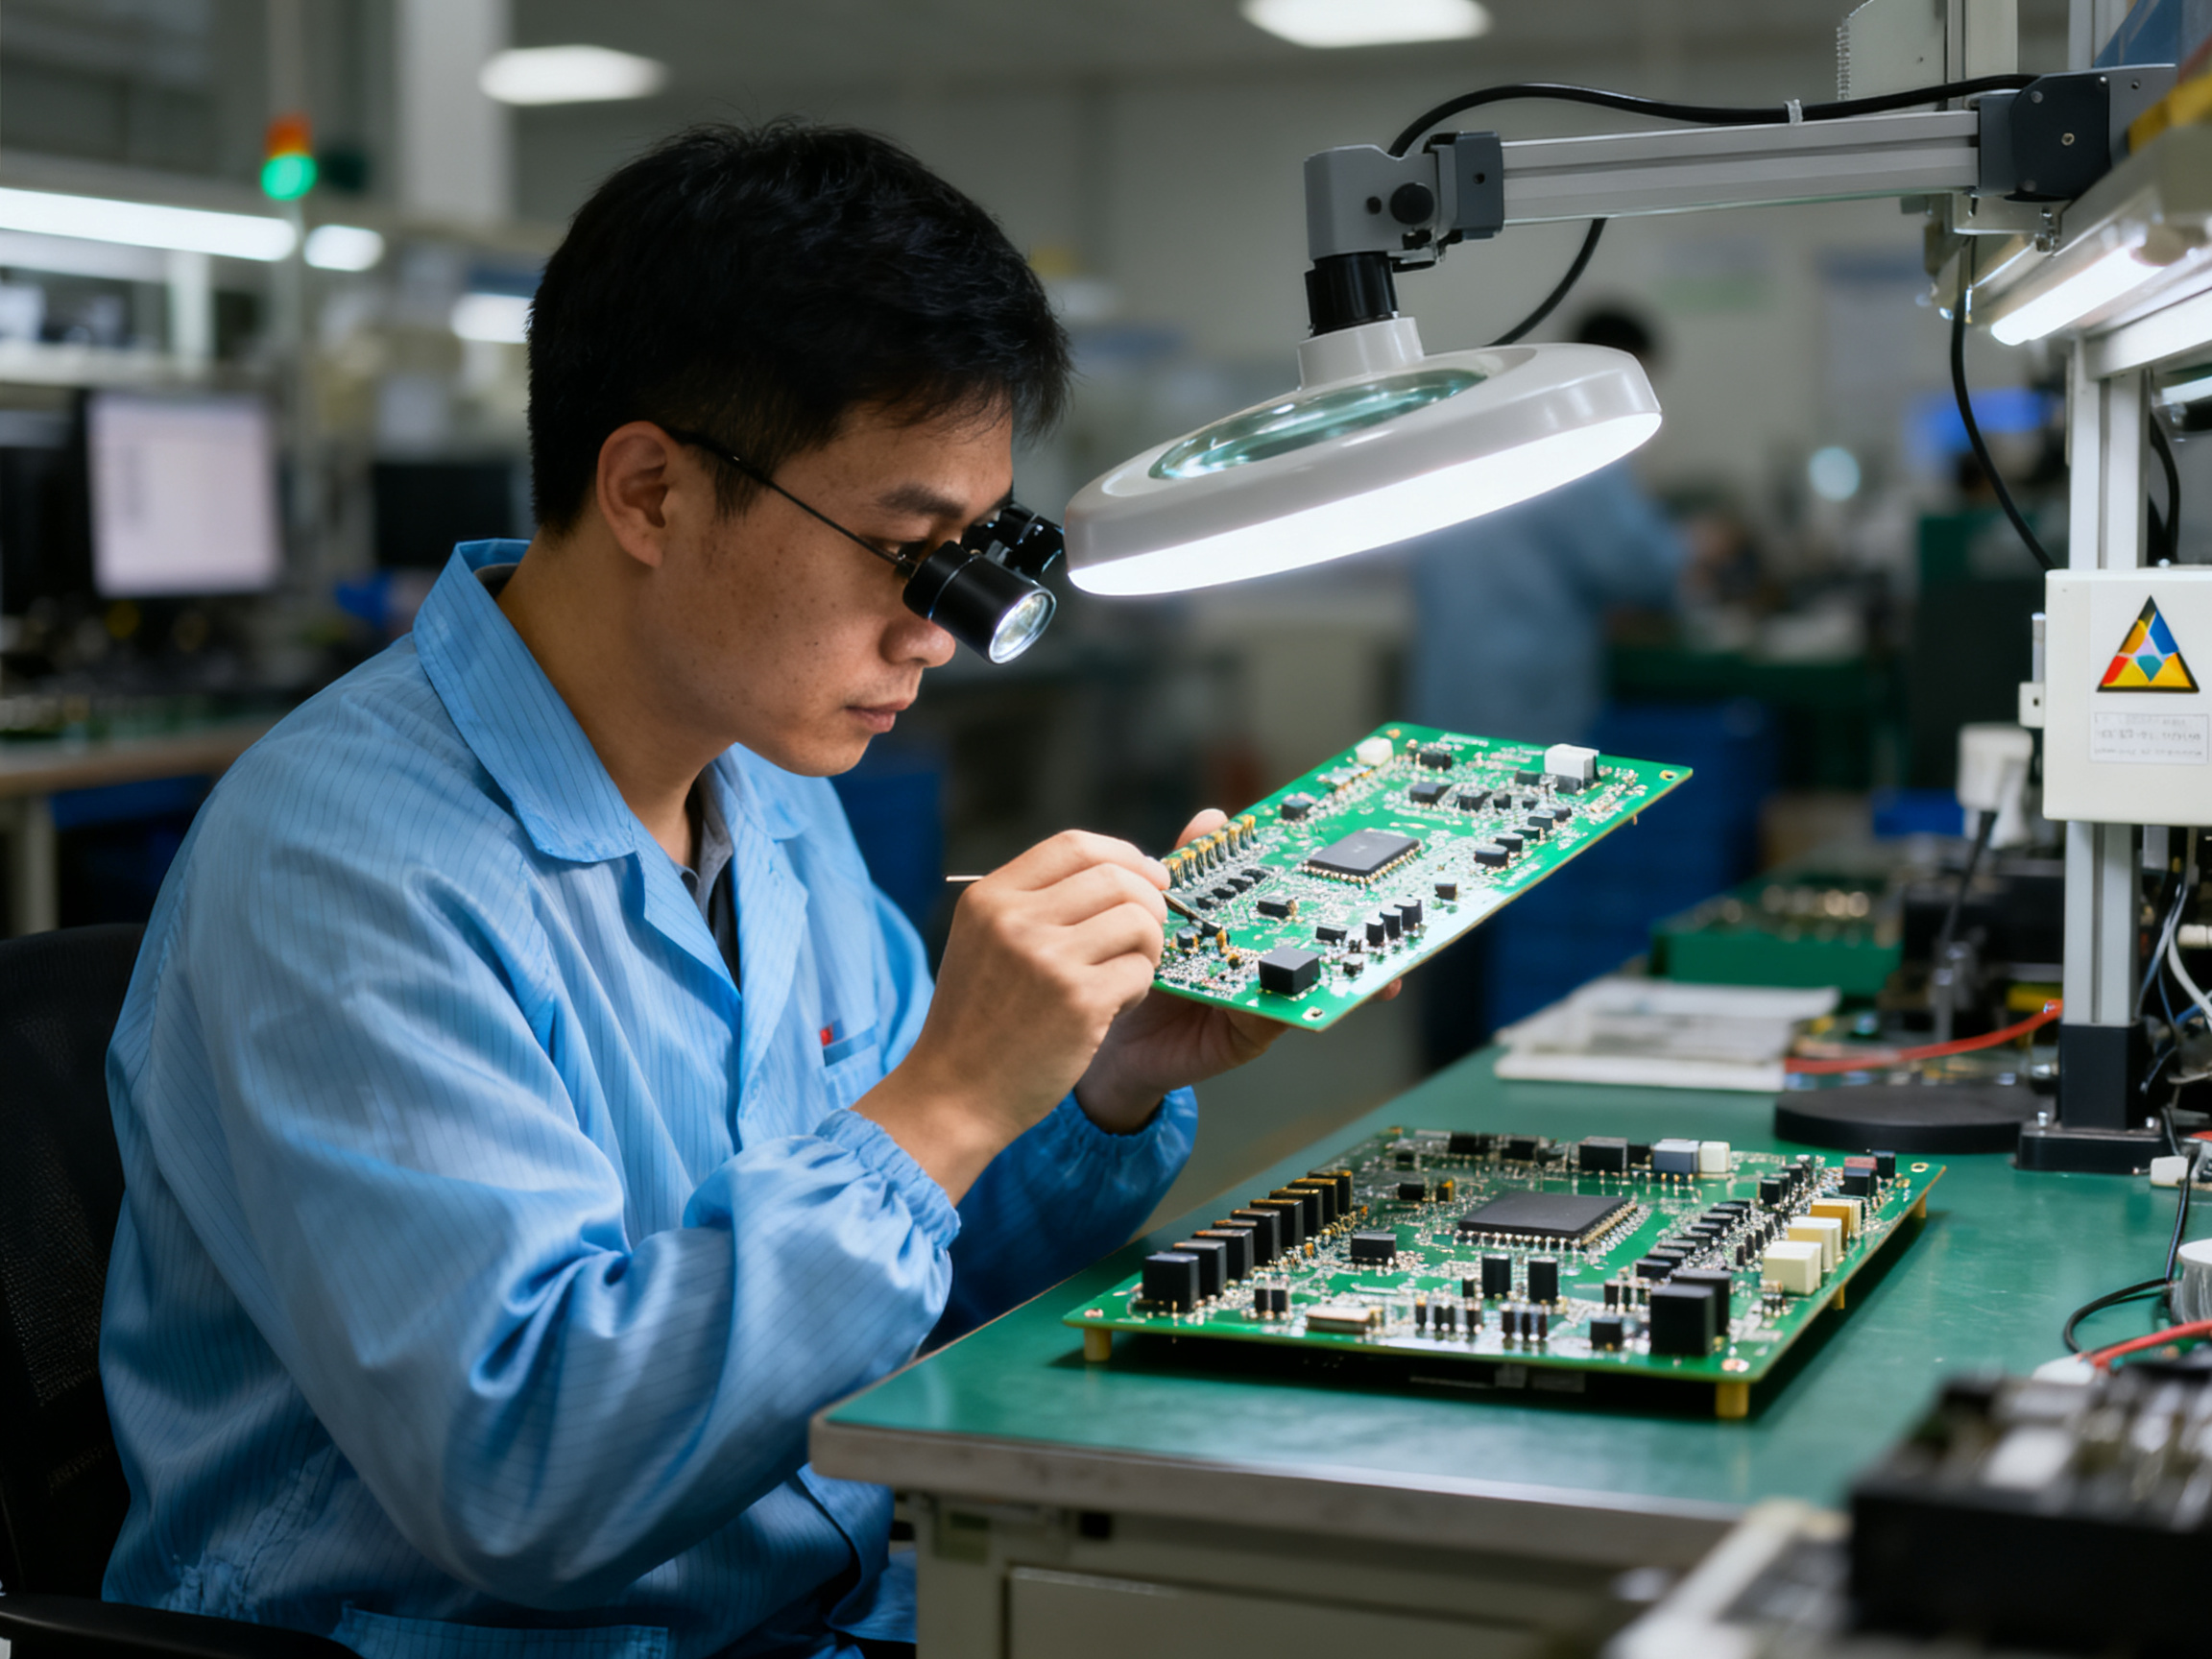
Before loading anything, check that your PCB has clean solder paste applied to the pads and components are properly placed. Any misalignment now becomes a headache later. We always run a quick visual check under good lighting because catching issues early saves everything.
Step 2: Set your temperature profile.
This is where the real work happens. You need to program the oven reflow temperature settings based on your solder paste specifications. Most pastes in 2026 use SAC305 or similar alloys that peak around 240 to 245 degrees Celsius. Load the appropriate profile or create one if needed.
Step 3: Allow the oven to stabilize.
Once your profile is loaded, let the machine heat up and stabilize. Most modern reflow ovens from Sun and Mountain and similar manufacturers need about 15 to 20 minutes to reach thermal equilibrium. Yeah, it feels like forever when you are eager to run boards, but rushing this leads to garbage results.
Step 4: Load the board onto the conveyor.
Place your prepared PCB onto the conveyor entrance. Make sure it sits flat and centered. The conveyor speed needs to match your profile settings for proper zone timing.
Step 5: Monitor the run.
Watch the first board through the process if you can. Many ovens in 2026 have real-time thermal monitoring so you can verify the actual temperature curve matches your target. If something looks off, you can stop and adjust before wasting a whole batch.
Step 6: Inspect finished boards.
After cooling, check your joints. Look for proper wetting, shiny solder joints, and no visible defects like bridging or tombstoning.
Expert Tip: Safety matters more than most people think. Reflow ovens reach 250 to 300 degrees Celsius at peak. Always use heat-resistant gloves when loading boards, keep flammable materials away from the machine, and make sure proper ventilation is in place. Burns and fumes are not fun. Trust me on this one.
Common Mistakes to Avoid
Running boards without proper profile verification is the number one mistake we see. Always validate with a test board and thermocouples before production runs. Another big one is overloading the conveyor with boards placed too close together. Each board needs adequate spacing for proper thermal exposure.
Ignoring maintenance schedules catches up with you fast. Clogged nozzles in forced-air systems, worn heating elements, and dirty sensors all degrade performance over time.
Do’s and Don’ts for Reflow Oven Operation
| Do | Don’t |
| — | — |
| Verify profile before production runs | Rush the preheat phase |
| Maintain consistent conveyor spacing | Stack boards too close together |
| Use proper PPE including gloves | Skip safety equipment |
| Clean sensors and heating elements regularly | Ignore maintenance schedules |
| Monitor first boards through each new run | Set and forget without oversight |
| Allow adequate stabilization time | Load boards before thermal equilibrium |
Following these steps consistently separates boards that pass inspection from ones that end up in the scrap pile. Practice makes perfect, and each run teaches you something new about your specific setup.
Programming a Reflow Oven: Setting Profiles and Parameters
A reflow profile is basically a roadmap telling your oven exactly how hot to get and when. Think of it like a recipe that spells out the temperature at each stage of the soldering process. Get the recipe wrong and your joints end up weak, bridged, or completely missing. That is why learning how to set reflow oven profile parameters correctly matters so much for production quality.
Most reflow ovens in 2026 use profile software that lets you program multiple zones independently. Sun and Mountain ovens, for example, include touch-screen interfaces where you can visually map out your temperature curve before running anything. The software shows you a graph of target temperatures against time, so you can see exactly what happens to your board at each stage.
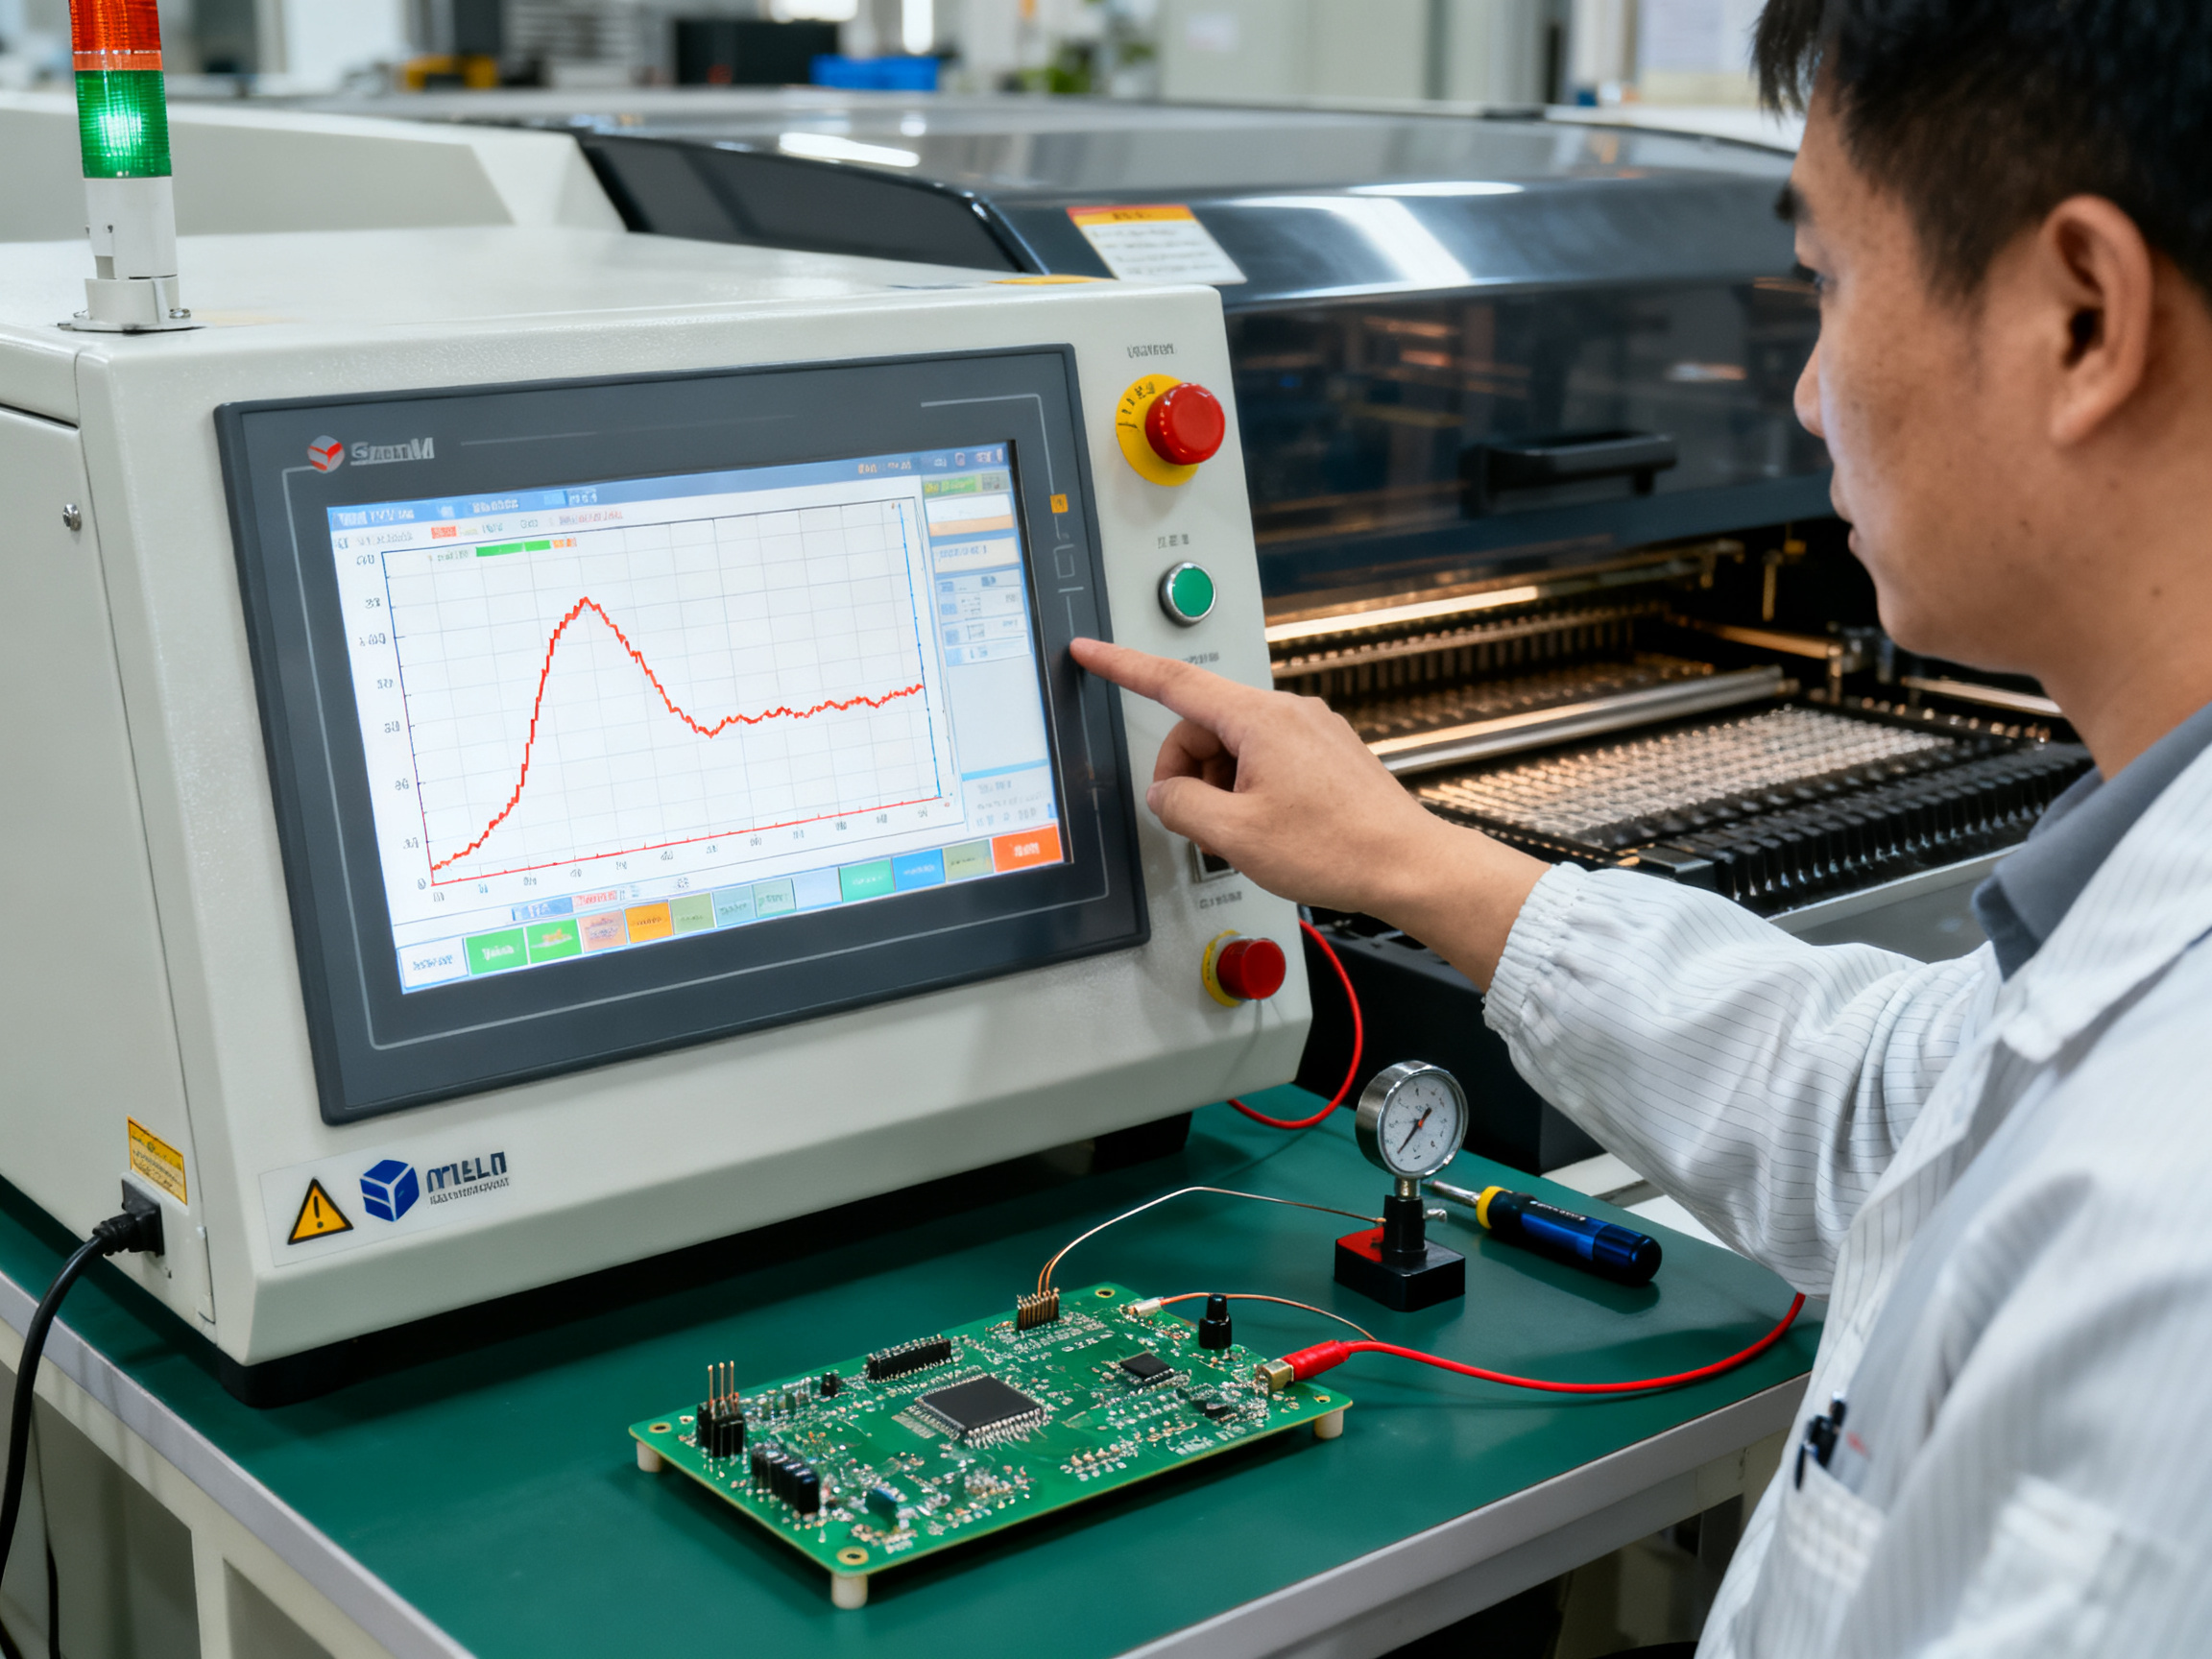
Setting Temperature Parameters
You start by defining the key temperature points. The paste datasheet is your best friend here because it tells you the specific temperatures your solder alloy needs. Most SAC305 pastes peak around 240 to 245 degrees Celsius, while leaded solders run cooler at about 183 degrees. Input these values into your profile software for the reflow zone peak temperature.
Next, you set the ramp rate, which is how fast the oven heats up during each zone transition. Too fast creates thermal stress; too slow wastes time. Most profiles use 1 to 3 degrees per second for the initial ramp. The soak zone temperatures typically sit between 150 and 200 degrees, and you control how long the board stays in that range before hitting peak heat.
Setting Time Parameters
Timing works hand-in-hand with temperature. You need to specify how long the board spends in each zone and the conveyor speed that controls it. Conveyor speed directly affects dwell time in each heating zone. Slower speeds mean more heat exposure; faster speeds mean less. A typical profile runs the board through at about 60 to 90 centimeters per minute, but this varies based on board size and thermal mass.
For calculating reflow oven cycle time, multiply your conveyor length by the speed setting. Add the heat-up and cool-down periods for the total process time. Most boards complete the cycle in 4 to 8 minutes depending on complexity.
Fine-Tuning for Real Results
From Our Experience: We have wasted more boards than I care to admit learning this lesson the hard way. The first profile you create will probably need adjustment. Run a test board with thermocouples attached to critical components and compare the actual temperature curve against your target. Small tweaks to soak time or ramp rate often make the difference between a scrap pile and a clean run.
Common adjustments come down to a few variables. If you see tombstoning, extend the soak time so components warm up more evenly. Cold joints usually mean the peak temperature is too low or dwell time too short. Voiding problems often stem from ramp rates that are too aggressive during the reflow stage.
Modern ovens with AI-assisted thermal management can suggest profile adjustments based on sensor feedback. But nothing beats running actual boards and measuring what is happening. Thermocouples do not lie.
Start conservative, validate thoroughly, and only scale up once you have consistent results. This approach has saved us countless times when a client needed to push cycle times shorter.
Optimizing Reflow Oven Cycle Time and Efficiency
Want to run more boards without breaking joints or tanking quality? Then you need to think seriously about cycle time optimization. This is where production lines either thrive or slowly bleed money through inefficiencies nobody notices until the quarterly review.
How to Calculate Reflow Oven Cycle Time
The math here is pretty straightforward. Cycle time equals the conveyor length divided by your speed setting, plus the heat-up and cool-down periods. Most reflow ovens in 2026 run conveyor speeds between 50 and 100 centimeters per minute depending on the profile. A standard 1.5-meter oven at 70 centimeters per minute gives you roughly 2 minutes of conveyor time. Add another 3 to 5 minutes for the full thermal profile, and you are looking at 5 to 7 minutes total per board.
The tricky part is that cycle time varies based on board complexity, component thermal mass, and the specific oven reflow temperature profile you are running. Dense boards with lots of BGAs or QFN packages need slower conveyor speeds and longer soak times. Simpler boards with larger components can usually handle faster throughput.
Strategies for Reducing Inefficiencies
Here is what actually works in 2026. First, leverage AI-assisted thermal management that newer Sun and Mountain ovens offer. These systems continuously monitor temperatures and adjust on the fly, which means you can push speeds faster while maintaining quality. The machine learns from each run and optimizes the profile automatically.
Second, batch intelligently. Instead of running one-off boards, group assemblies with similar thermal requirements. Switching profiles mid-run kills efficiency because the oven needs time to stabilize between different temperature settings.
Third, keep your equipment maintained. Clogged heating elements or dirty sensors force you to run slower profiles to compensate for uneven heating. Regular maintenance is not glamorous, but it directly impacts your throughput numbers.
The Profiling Quality Connection
Here is the thing nobody tells you upfront. A perfectly optimized profile actually increases throughput. I know that sounds backwards. You would think slower and more careful means less production, but hear me out.
We tested this last quarter with a client running automotive electronics. They were being super conservative with their profiles, running boards at 60 centimeters per minute because they were scared of defects. After profiling optimization, we pushed them to 85 centimeters per minute with a properly tuned thermal profile. Defects dropped by 12 percent. Throughput went up by 40 percent.
Proper profiling means fewer reworks, less scrap, and ultimately more good boards per hour. The oven reflow temperature curve you choose determines everything downstream.
Cycle Time Comparison by Profile Settings
| Conveyor Speed | Typical Cycle Time | Best For |
| — | — | — |
| 50-60 cm/min | 7-9 minutes | Dense, heat-sensitive boards |
| 65-80 cm/min | 5-7 minutes | Standard production runs |
| 85-100 cm/min | 4-5 minutes | Simple assemblies, high volume |
The numbers tell the story. Faster is possible, but only when your profile matches your board requirements.
Energy efficiency matters too. Modern ovens with advanced insulation and heat recovery systems use significantly less power than models from even three years ago. If you are running older equipment, the ROI on an upgrade might be closer than you think.
Common Problems in Reflow Soldering and Troubleshooting Tips
Even the best reflow ovens throw curveballs. Knowing how to diagnose and fix common problems saves time, money, and a whole lot of frustration. Here is what typically goes wrong and how to fix it.
Tombstoning
That annoying situation where a component stands up on one end like a tombstone? It usually happens when the soak zone is too short or the ramp rate is too fast. Components heat unevenly, causing one side to wet before the other. The surface tension then pulls the lighter side up.
Fix it by extending your soak time or slowing the ramp rate. This gives both pads time to reach the same temperature before peak heat hits.
Cold Joints
Dull, grainy joints that do not look right? Cold joints happen when peak temperature falls short or the board does not spend enough time at that temperature. The solder melts but never fully wets the surfaces.
Check your thermocouple placement first, because a bad reading can throw everything off. If the temperature checks out, bump your peak by 5 to 10 degrees or lengthen the dwell time in the reflow zone.
Bridging and Solder Balls
When solder connects two pads that should stay separate, you have a bridge. Solder balls scattered around are annoying too. Both issues often trace back to paste problems or profile trouble.
Make sure your solder paste has not expired and was stored correctly. If the paste looks fine, the ramp rate might be too aggressive, causing the flux to splatter before it activates properly. Slowing down the heating curve usually helps.
Voids
Gaps inside solder joints weaken connections and cause field failures. Voids come from moisture in components or boards that was not baked out before reflow.
The fix is simple. If you see voiding, pre-bake your assemblies at 125 degrees for 4 to 6 hours before reflow. This drives off trapped moisture that turns into gas when things heat up.
Maintenance Problems That Mimic Profile Issues
Here is the thing nobody tells you. Sometimes the profile is perfect but the machine is lying to you. Dirty sensors give wrong readings. Worn heating elements create hot and cold spots. Clogged nozzles in forced-air systems blow unevenly.
We learned this the hard way last month. Spent two days tweaking profiles for a new board. Turns out one of the zone sensors was caked with flux residue. Swapped it out and the problem vanished.
Always check your equipment before you chase profile changes. It saves so much wasted time.
Quick Troubleshooting Reference
| Problem | Likely Cause | Quick Fix |
| — | — | — |
| Tombstoning | Short soak, fast ramp | Extend soak time |
| Cold joints | Low peak temp | Increase peak by 5-10 degrees |
| Bridging | Ramp too fast | Slow down heating rate |
| Solder balls | Flux activation issues | Check paste, slow ramp |
| Voids | Moisture in components | Pre-bake before reflow |
Most reflow problems trace back to three things. Your profile needs adjustment. Your paste has a problem. Or your machine needs maintenance. Work through each systematically and you will find the culprit.
Real-time monitoring systems on newer ovens help catch these issues before they become production disasters. Sun and Mountain ovens include sensor diagnostics that flag maintenance needs automatically, which has saved us more than once when a heating element was starting to fail.
Future Trends in Reflow Oven Technology
Let me talk about where reflow oven tech is heading. This stuff actually excites me because the changes in 2026 feel substantial, not just incremental tweaks.
Energy efficiency has become a major focus. Manufacturers are packing ovens with better insulation, heat recovery systems that capture waste warmth and channel it back into the process, and heating elements that sip power instead of guzzle it. Some models now include energy-saving modes that dial back consumption during idle periods without sacrificing ready-to-run responsiveness [1].
The AI and IoT integration angle is where things get really interesting. Reflow ovens in 2026 are becoming connected, self-optimizing systems that would have seemed like science fiction a decade ago. Real-time sensor data lets these machines adjust thermal profiles on the fly, adapting to variations in board composition or ambient conditions without human intervention [2].
Predictive maintenance is another big one. Instead of waiting for a heating element to fail mid-production run, newer ovens monitor component wear and flag issues before they cause problems. IoT connectivity means you can track thermal profiling data from your phone, which is surprisingly handy when you are managing multiple lines [3].
Sun and Mountain already have models with these capabilities hitting the market, and honestly, the gap between smart ovens and traditional ones is widening fast. If you are running older equipment, now is the time to evaluate whether an upgrade makes financial sense.
The trajectory seems clear. We are moving toward fully autonomous reflow processes where the machine handles most adjustments automatically, and engineers focus their attention on exception handling and process improvement. The tools keep getting smarter, but knowing how they work underneath still matters.
Conclusion: Mastering Reflow Ovens for Precision Manufacturing
So there you have it. Everything you need to know about reflow ovens, from how they work to programming profiles, troubleshooting problems, and squeezing every bit of efficiency out of your production line.
The big takeaway? Quality and speed are not mutually exclusive. A properly tuned reflow profile means fewer defects, less rework, and actually faster throughput than playing it safe with overly conservative settings. We have seen it happen with clients again and again. The oven reflow temperature curve you choose shapes everything downstream.
Understanding the four temperature zones, knowing how to set reflow oven profile parameters correctly, and catching problems early before they turn into scrap piles. These skills separate operators who struggle from those who ship clean boards consistently.
The technology keeps getting smarter too. AI-assisted thermal management and predictive maintenance on modern Sun and Mountain ovens handle more of the heavy lifting, but knowing what is happening underneath still matters when something goes sideways.
Start with what we covered today. Run those test boards with thermocouples, validate your profiles, and only push speeds once you have consistent results. Your future self will thank you when the scrap pile shrinks and throughput climbs.
Need help dialing in your specific setup? Sun and Mountain offers consultation services for production engineers looking to optimize their reflow processes. Sometimes an outside perspective catches things your team has been overlooking.
Now get out there and make some solid joints.